
User Access Control
Access to the Feedonomics platform is self-managed at the account level. Your organization decides who can log in, what they can see, and what changes they can make to your product data, directly from the User Access Control page.
Every account has one or more authorized contacts, each assigned an access level that determines their permissions, from submitting support tickets to making direct changes in your databases. This structure keeps your account secure while making it straightforward to bring new team members on board, hand off ownership when someone changes roles, and keep your list of contacts accurate over time.
This guide covers the available access levels, what the Primary User can do, and how to add, update, or remove the people who manage your Feedonomics account. If you’d rather not make a change yourself, or run into something the page won’t let you do, Feedonomics support can make the update for you through the FeedSupport Portal.
What User Access Control is
User Access Control is the page where your account’s authorized contacts are managed. It is visible only to Primary Users. It determines who has Primary, Write, Read+, Read, or Support Only access on your account, and who Feedonomics should reach out to for account-related requests.
Open User Access Control
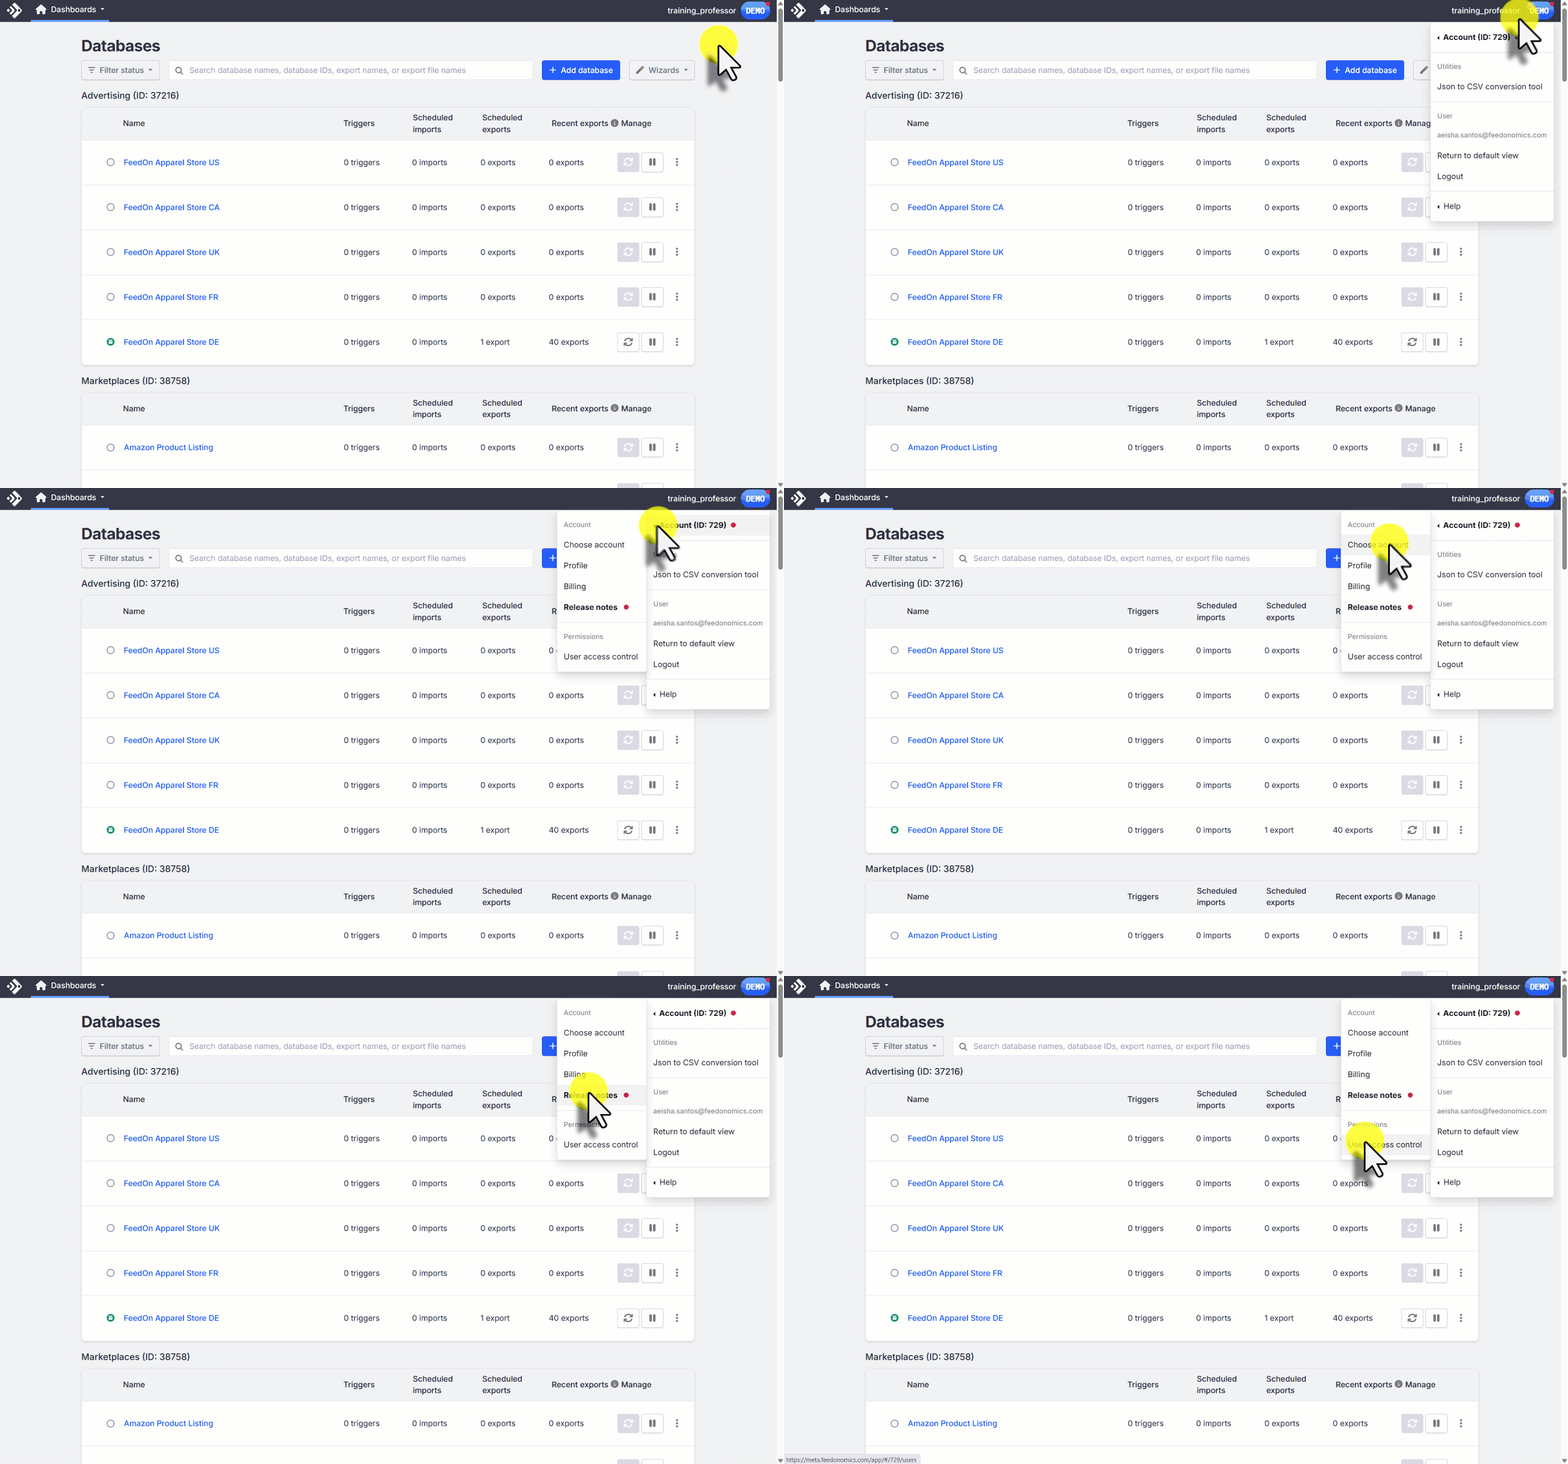
This page is visible only to users with Primary access. If you don’t see it, reach out to your account’s Primary User to discuss elevating your access. An account can have more than one Primary User.
Access levels
There are five access levels available on the User Access Control page:
Every level can submit tickets through the FeedSupport Portal. The levels differ only in what else they allow. See who can submit tickets for how this plays out in the portal.
Account-level vs database-level access
Access can be granted at two different scopes. Know which one applies before adding or updating a user:
- Account-level access applies across every database under the account. A user granted access at the account level can act on any database within it, at whatever access level (Primary, Write, Read+, Read, or Support Only) they’ve been assigned.
- Database-level access is scoped to one specific database within the account. This is useful when a contact should only work with a single feed or storefront rather than everything under the account, or when different teams manage different databases.
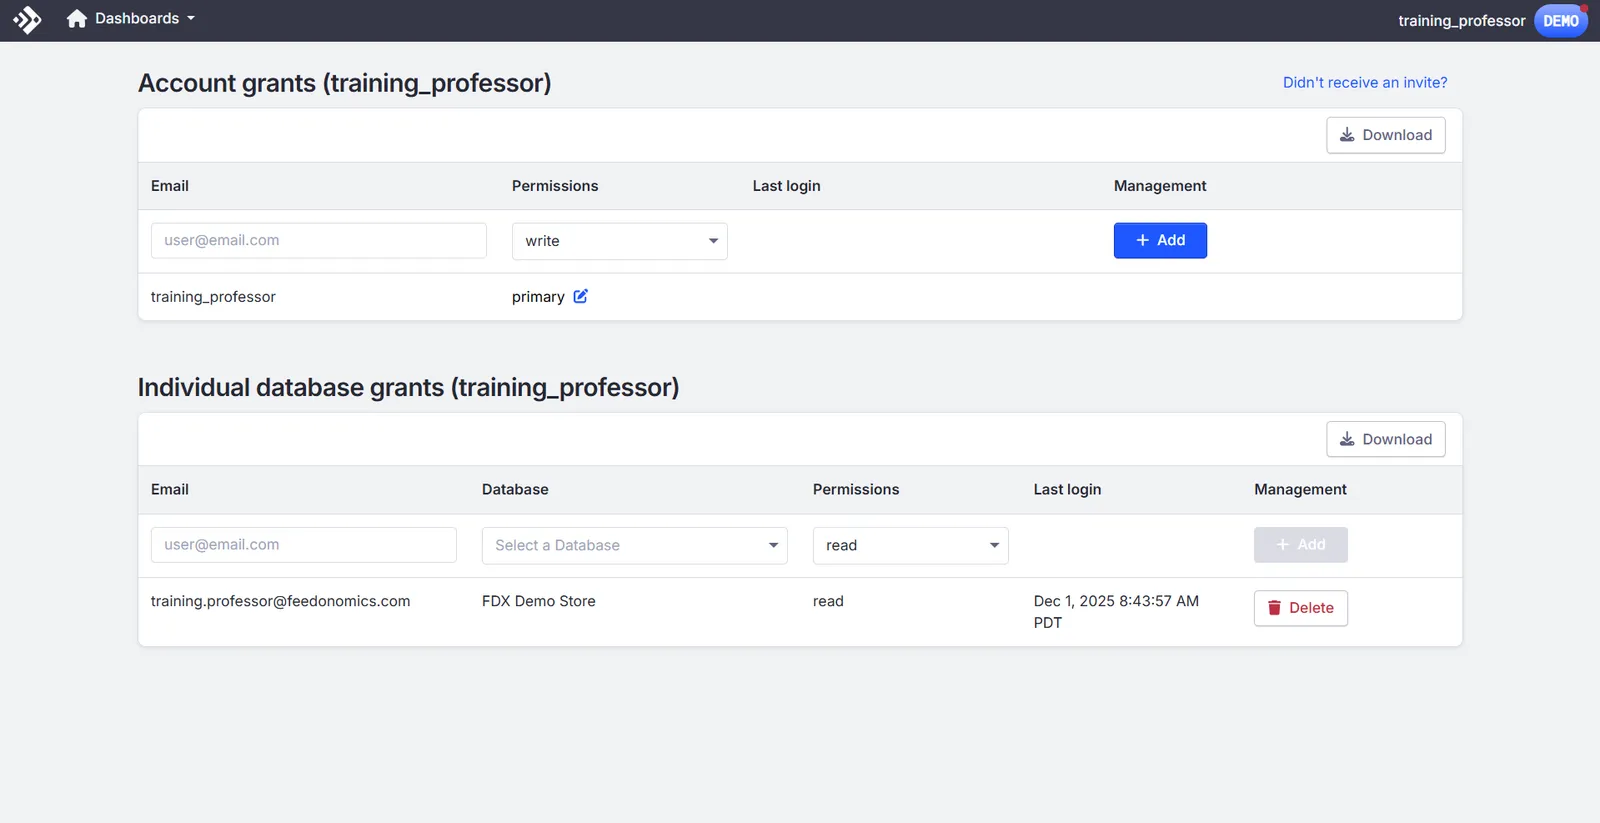
If a user needs access to more than one database, decide whether they should be granted access at the account level (broadest) or added individually to each relevant database. Granting account-level access to someone who only needs one database can give them more reach than intended.
The Primary User role
The Primary User is the main point of contact for account access, and the only role that can manage other users directly. A Primary User can:
- Add or remove emails from the User Access Control page
- Submit new support tickets
- Make changes to data in the database, including export and import
If your Primary User leaves the company or changes roles, you can reassign the role yourself from the page. If you’d rather have Feedonomics walk you through it, open a ticket in the FeedSupport Portal and the team will help transfer that responsibility to the right person.
If you request User Access Control changes through FeedSupport, no changes are made without written authorization from the Primary User. See Update your point of contact for how that works.
Add a new user
You can add most new users yourself, directly from the User Access Control page. Support is available if you’d prefer they do it for you, or if an approval needs a hand.
Confirm the access level
Decide whether the new user should have Primary, Write, Read+, Read, or Support Only access, and whether that access applies to the whole account or a single database.
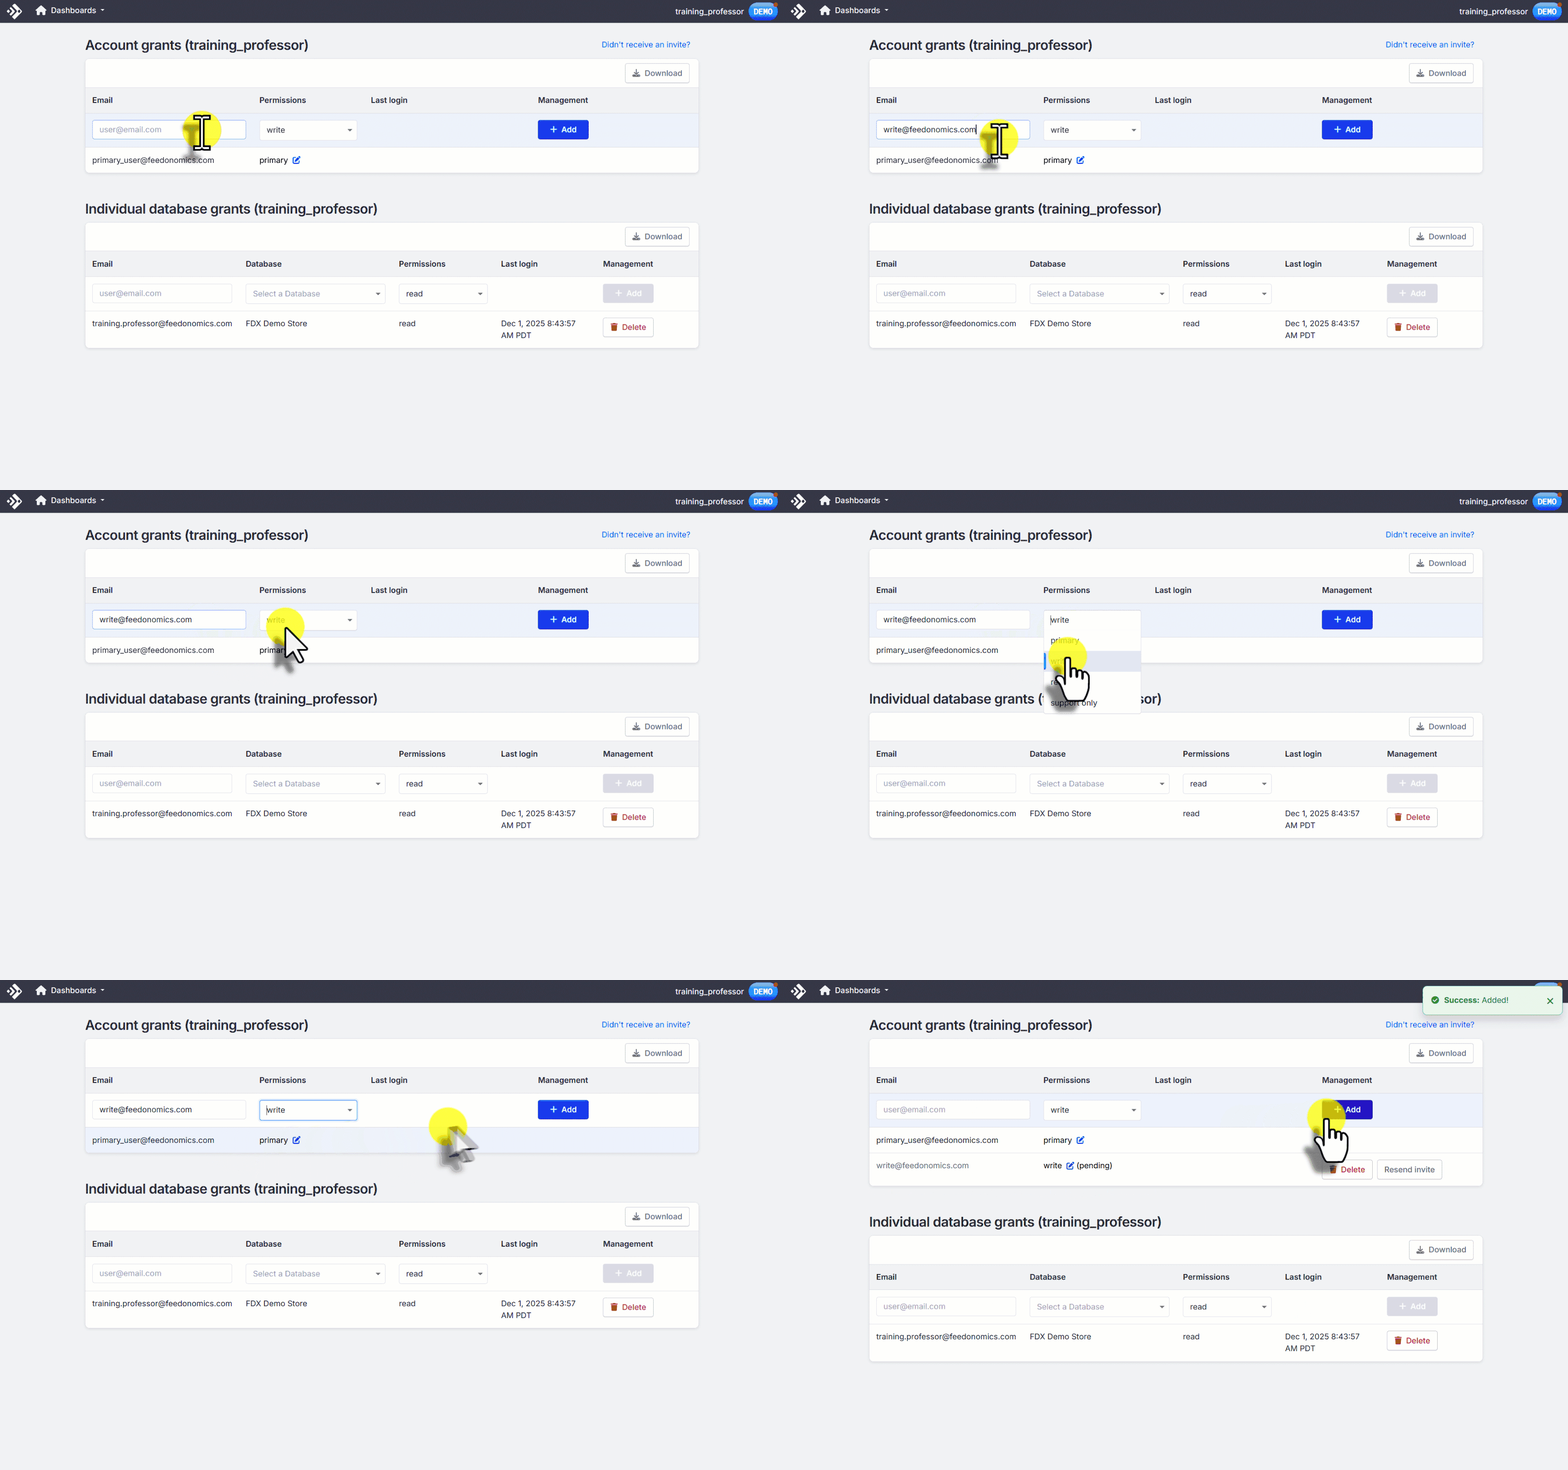
New users should use an email address that belongs to your company or store domain whenever possible. If the new contact is from a third party or partner company, the Primary User’s approval is required before access is granted, whether you or support is granting it.
Update your point of contact
If your team has a new point of contact for the account, or someone has left the company, you can update this yourself if you have Primary access, or ask support to handle it for you.
Update the contact
If you have Primary access, update the contact directly on the User Access Control page. Otherwise, notify Feedonomics support of the change through the FeedSupport Portal.
Choose a new Primary User if needed
If the outgoing contact was your Primary User, decide who should become the new Primary User. If support is handling the change, they’ll send a short form to confirm it.
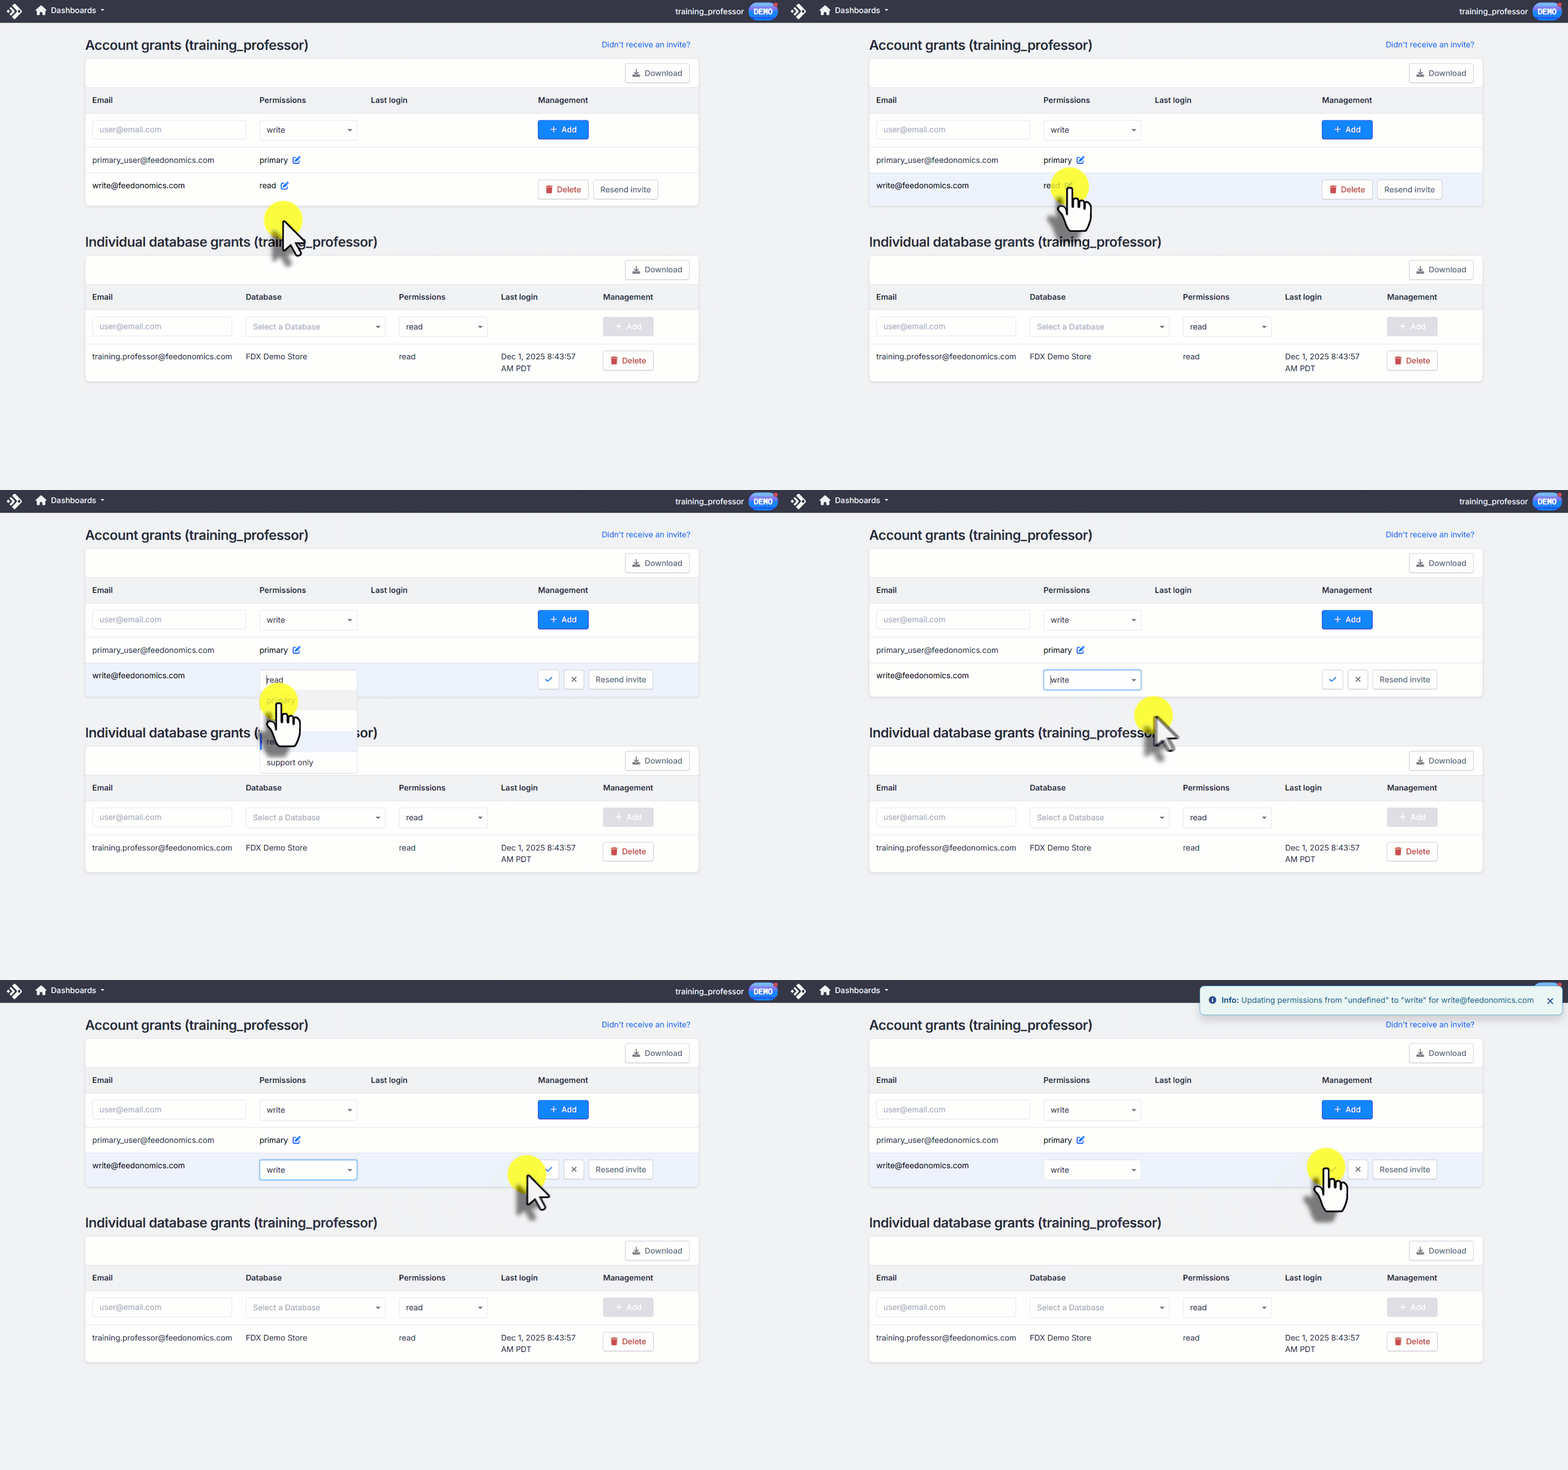
If there is no Primary User on file and the incoming contact’s email is also outside your company domain, Feedonomics may ask another verified contact at your organization to confirm the change before proceeding. This extra step keeps your account secure.
No Primary User exists and the new contact is a third party
Feedonomics checks for other verified contacts on the account and asks them to confirm, or escalates internally if none exist.
The Primary User doesn't want to grant full access to a third party
The third party can be set up with Support Only access instead, so they can submit tickets without reading your data.
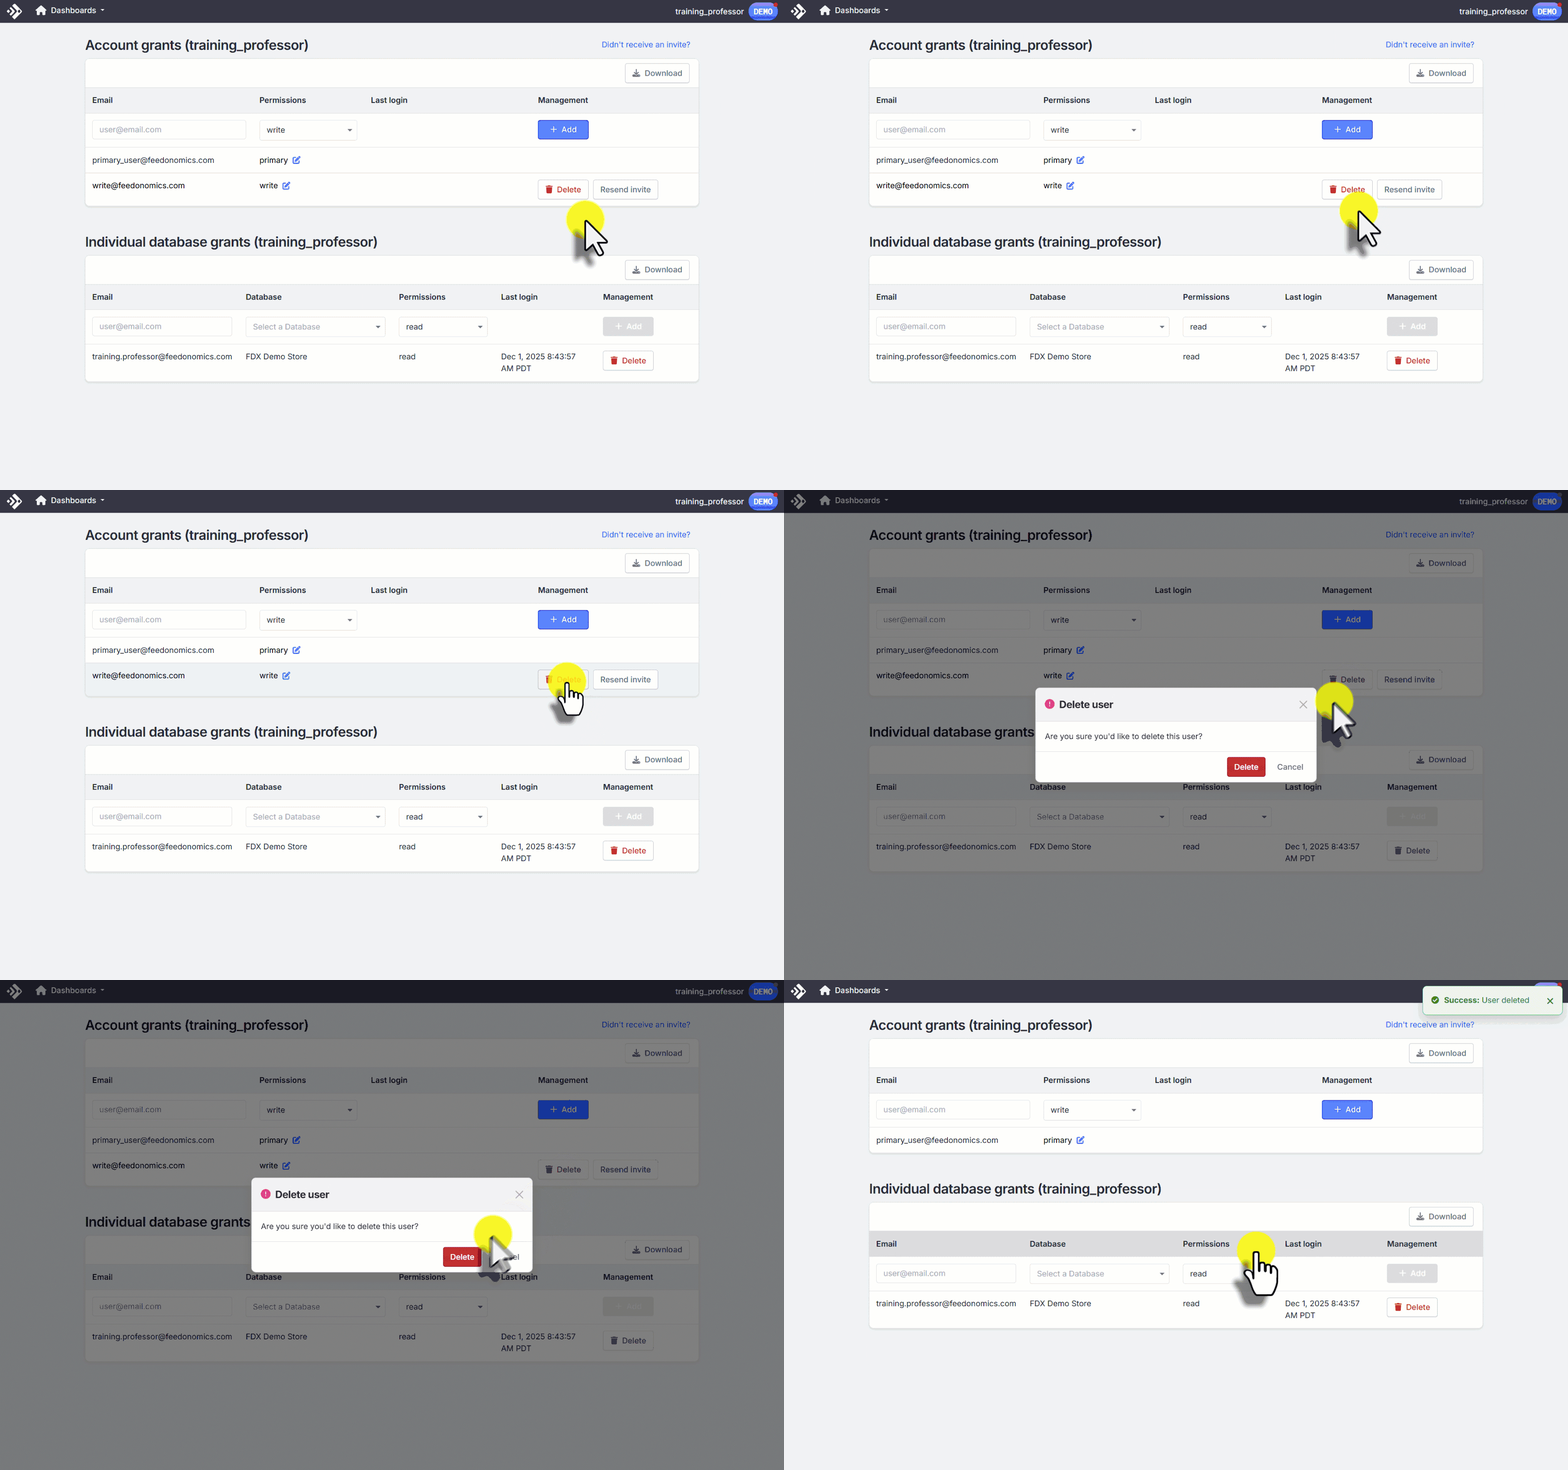
Remove a user or invalid email
If you have access to the User Access Control page yourself, you can remove an email directly. There’s no need to open a ticket. Otherwise, the support team can make the update for you.
Remove the address
If you have Primary access, remove the address directly from the User Access Control page. Otherwise, let Feedonomics support know which email should be removed.
Get help
Most of the day-to-day changes covered in this guide, such as adding a user, updating your point of contact, or removing an invalid email, can be done yourself from the User Access Control page if you have the right access level. If you don’t have access, aren’t sure which option applies to your situation, or want Feedonomics to handle it, open a ticket.
This guide is a general reference. Specific steps or available options may vary slightly depending on your account setup.