
Exclude/Include Products
Exclude/Include Products is a self-managed workspace that lets you exclude products from your feed exports, or bring previously excluded products back, in real time. You search for the products you want, choose whether to exclude or include them in a channel export, preview exactly what will change, and publish, all in one place.
This guide walks through how the workflow works, how to see what’s blocking a product from an export, how to manage the rules you’ve created, and how to escalate to support when needed. Most of it you can do yourself. A Support Specialist is available if you’d rather have the team handle it.
Open the workspace
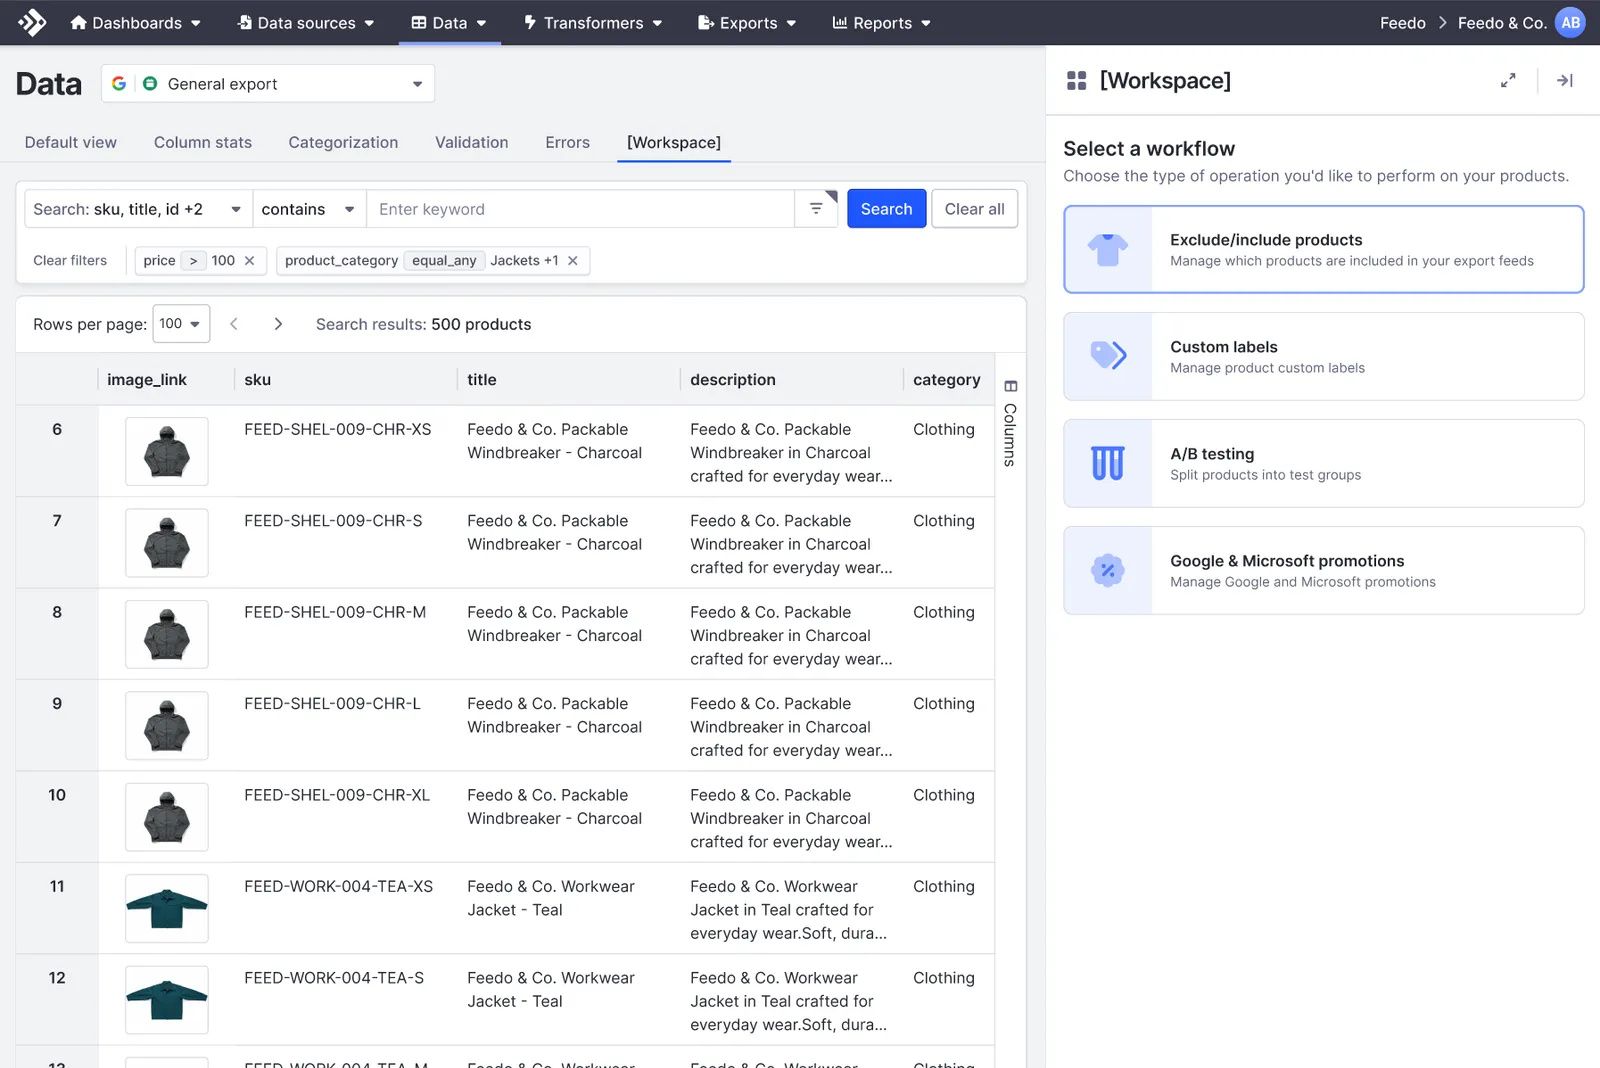
You can reach the workspace from the FeedSupport Portal by selecting the Exclude/Include Products tile, or directly from the Workspace tab on your Data Page.
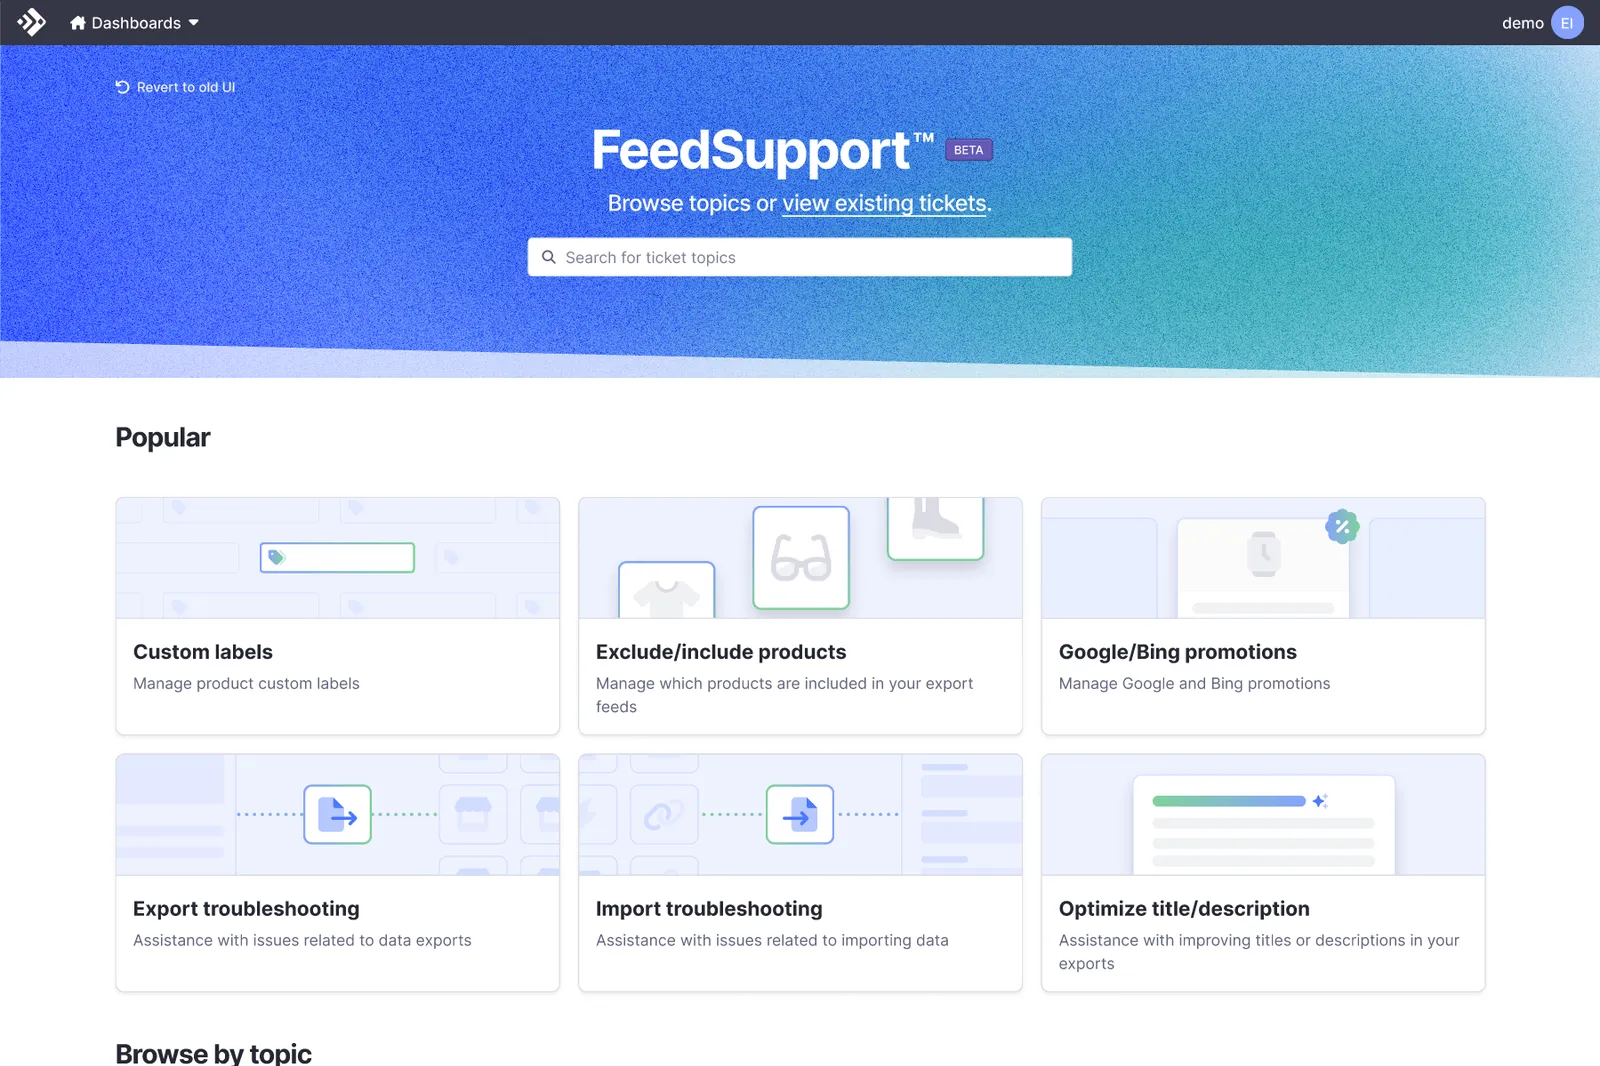
Select the Exclude/Include Products tile
On the FeedSupport Portal home screen, find Exclude/Include Products under Popular and select it. It sits alongside other self-managed tiles like Custom Labels and Google/Bing Promotions. This opens the Feedonomics workspaces launch page with the Workflow already set to Exclude/Include Products, so you don’t need to pick a mode yourself.
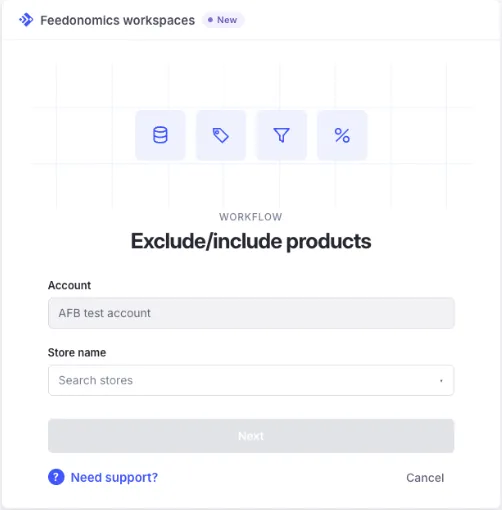
If you’re already on your Data Page, open the Workspace tab and select Exclude/Include Products as the workflow. The Workspace tab is only available on the General Export page. It does not appear on the raw data page or on an individual export-specific page.
The five-step workflow
Every change follows the same pattern whether you’re excluding or including products. Only the action in the second step changes.
You might exclude products to stay compliant in a regulated category (like alcohol, CBD, or supplements), pull items that are out of stock or on promotional hold, or meet a channel’s own restrictions on certain product types. Google, for example, doesn’t allow gift cards or digital products in Shopping ads, and Amazon has its own list of restricted categories and gated brands that vary by marketplace.
You might include products to get a new launch live on your channels within minutes instead of waiting on the next sync, spotlight best sellers for an active campaign, or take more direct control over what shows up on your channels without opening a ticket.
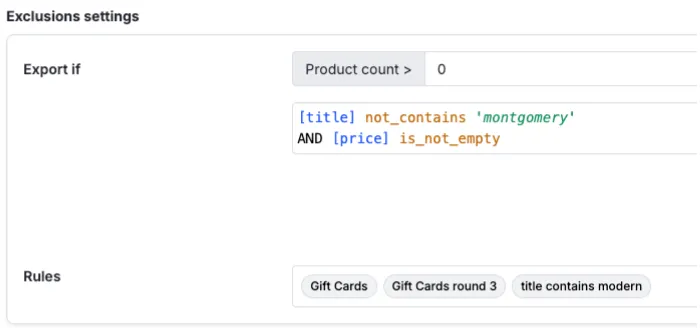
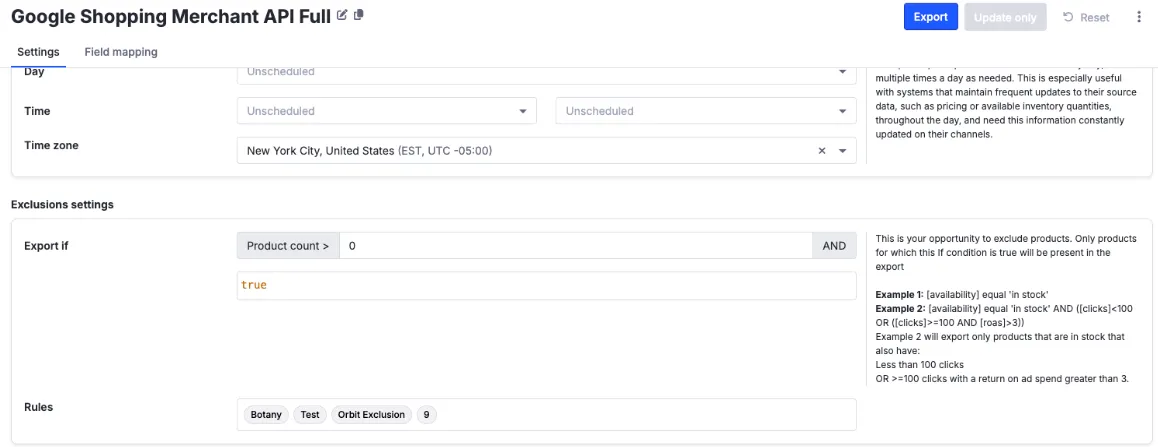
Nothing here builds a new transformer. Transformers are rules that tell the platform how to transform, filter, and optimize product data. Exclude/Include rules function like an export-if condition at the export level, but they aren’t listed in the Transformers tab or inside the Export If conditions themselves. You find and manage them in the Manage Rules tab of the workspace. On the export details page, under Exclusion settings, a Rules field lists any exclusion rules tied to that export, and selecting a rule takes you straight to it in Manage Rules.
Exclude products
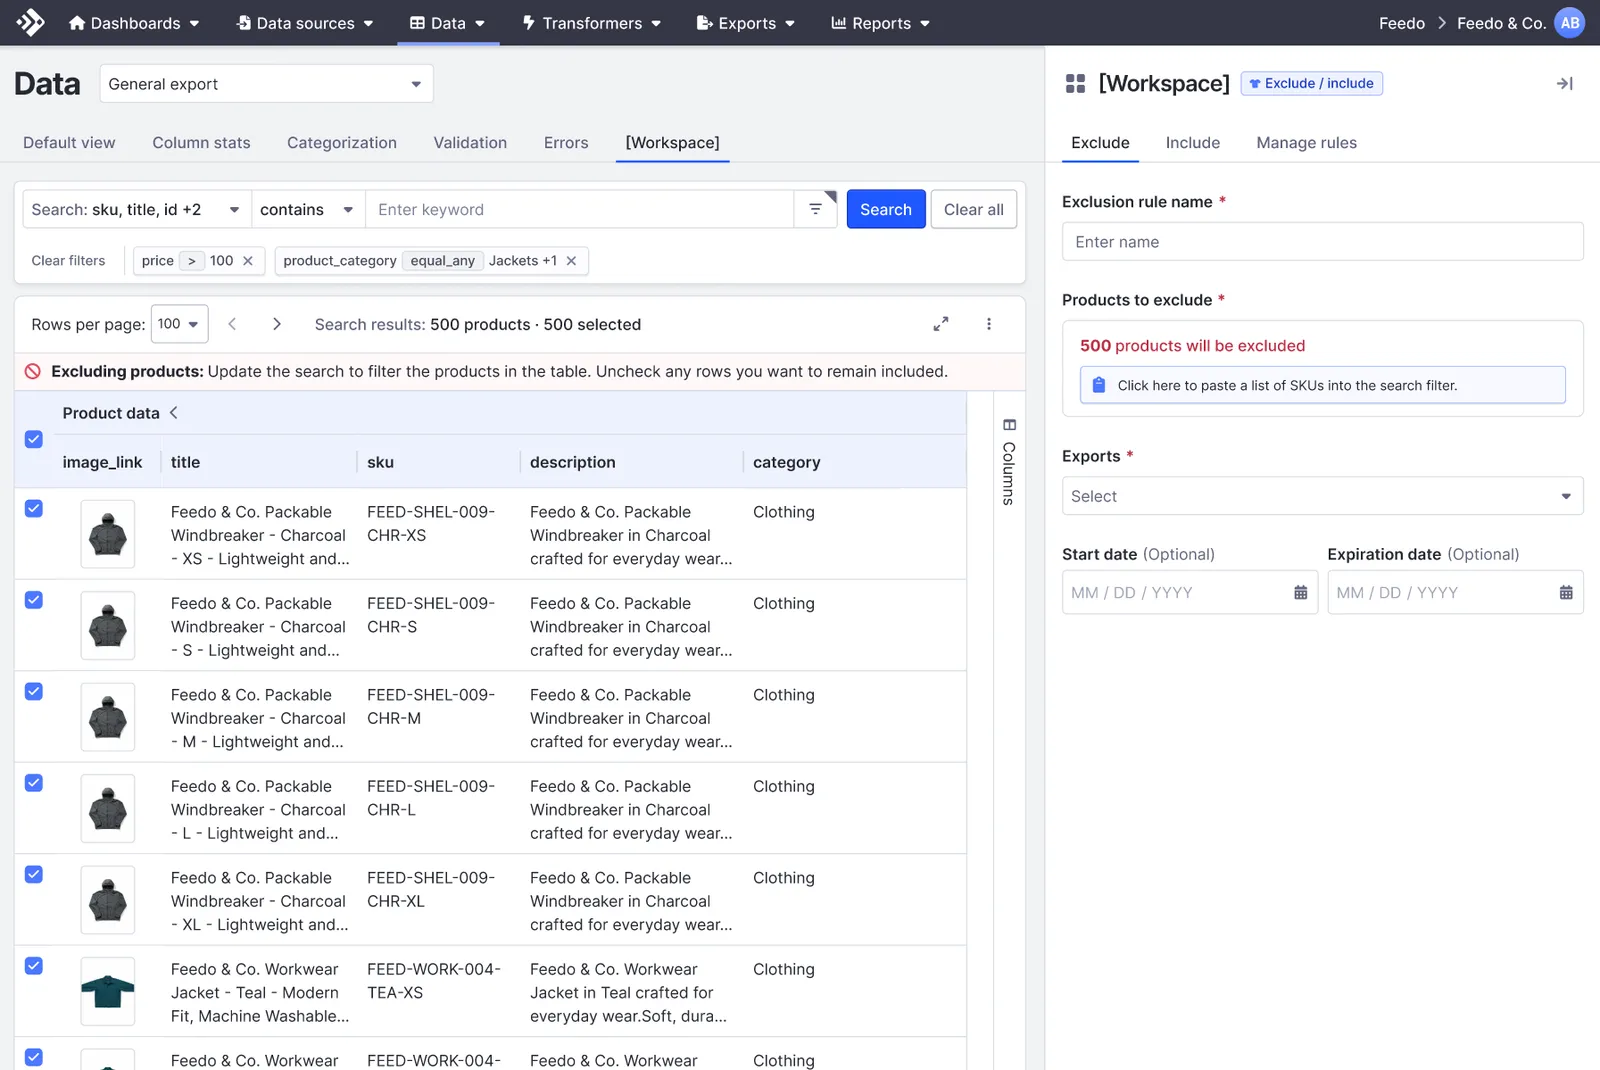
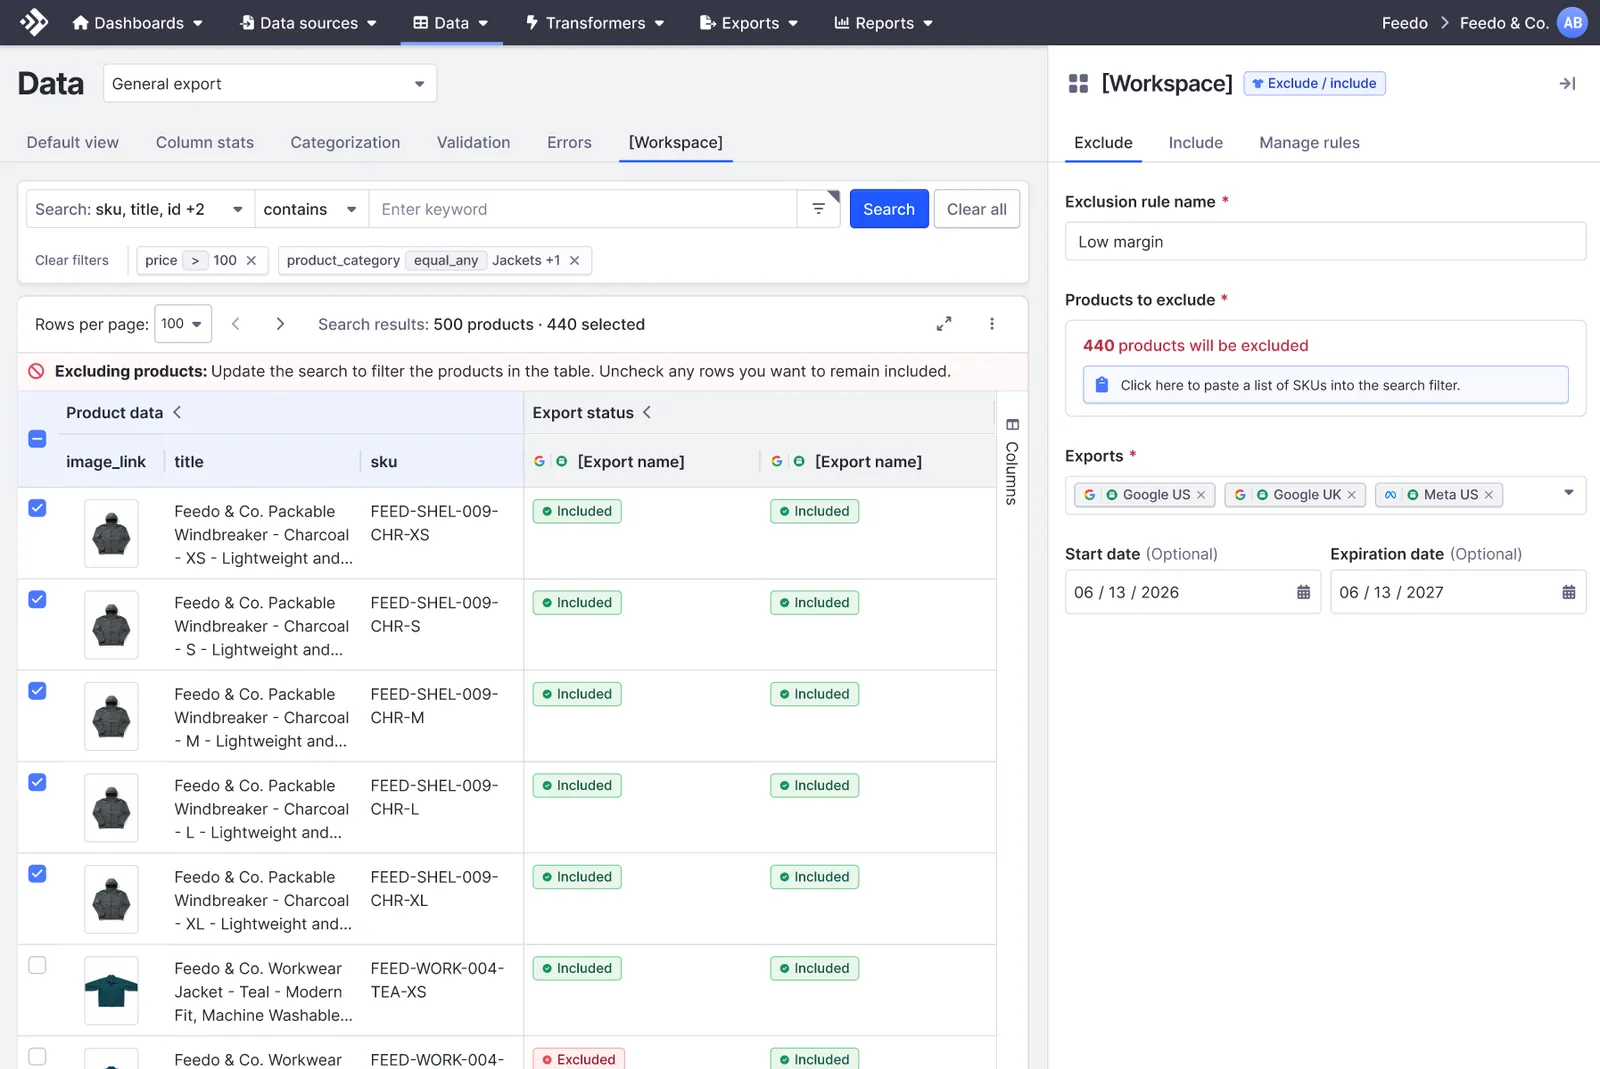
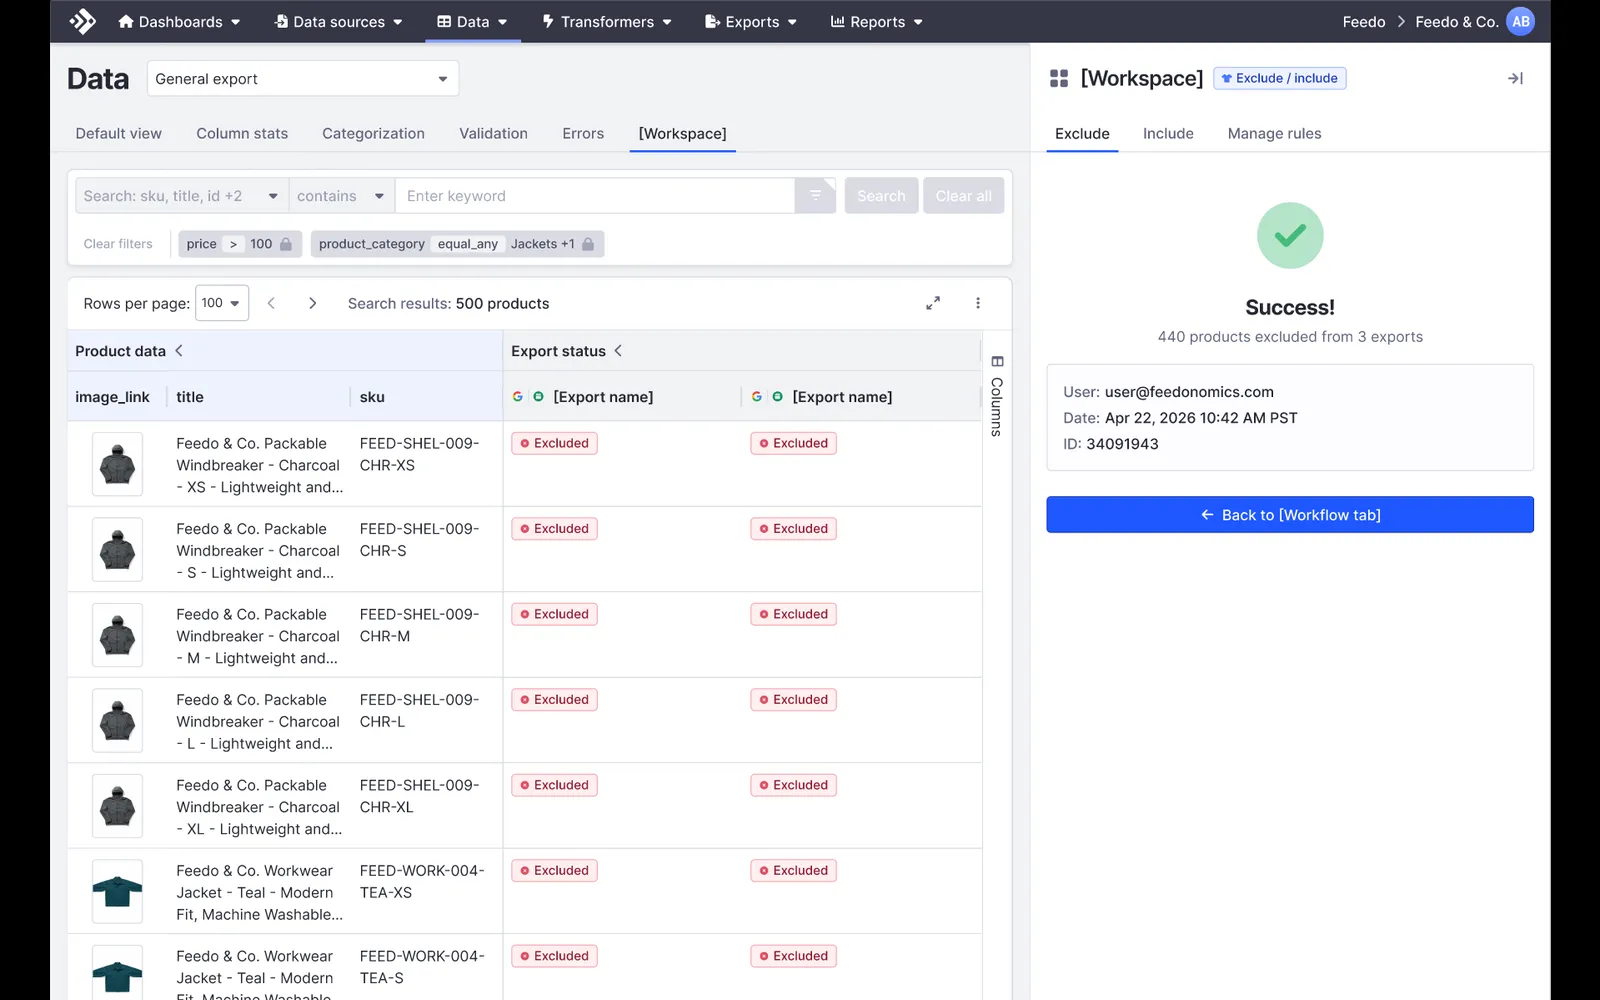
Excluding removes matching products from one or more exports by creating a named rule.
Identify the products
Paste a SKU list, use an attribute filter (brand, category, price, and so on), or write an if/then condition. You can paste a list of SKUs directly into the search filter instead of building filters one by one.
Name the rule and choose exports
Give the rule a name and choose which export(s) it applies to. The Push export when changes are published toggle controls what happens when you save:
- On: the export runs immediately with your changes as soon as you select Save Changes.
- Off (default): your changes are saved, but the export won’t run until its next scheduled cycle. You can check when that is on the Exports List page.
Set start and expiration dates (optional)
Set a start date and an expiration date so the exclusion cleans itself up automatically. When a rule expires, it’s turned off rather than deleted, so the rule and its history stay available if you need to reference it later.
Start and expiration dates take effect at midnight US Eastern Time on the date selected. If you need the rule to start or end at a specific time of day, submit a support ticket instead of using the date fields.
Preview the change
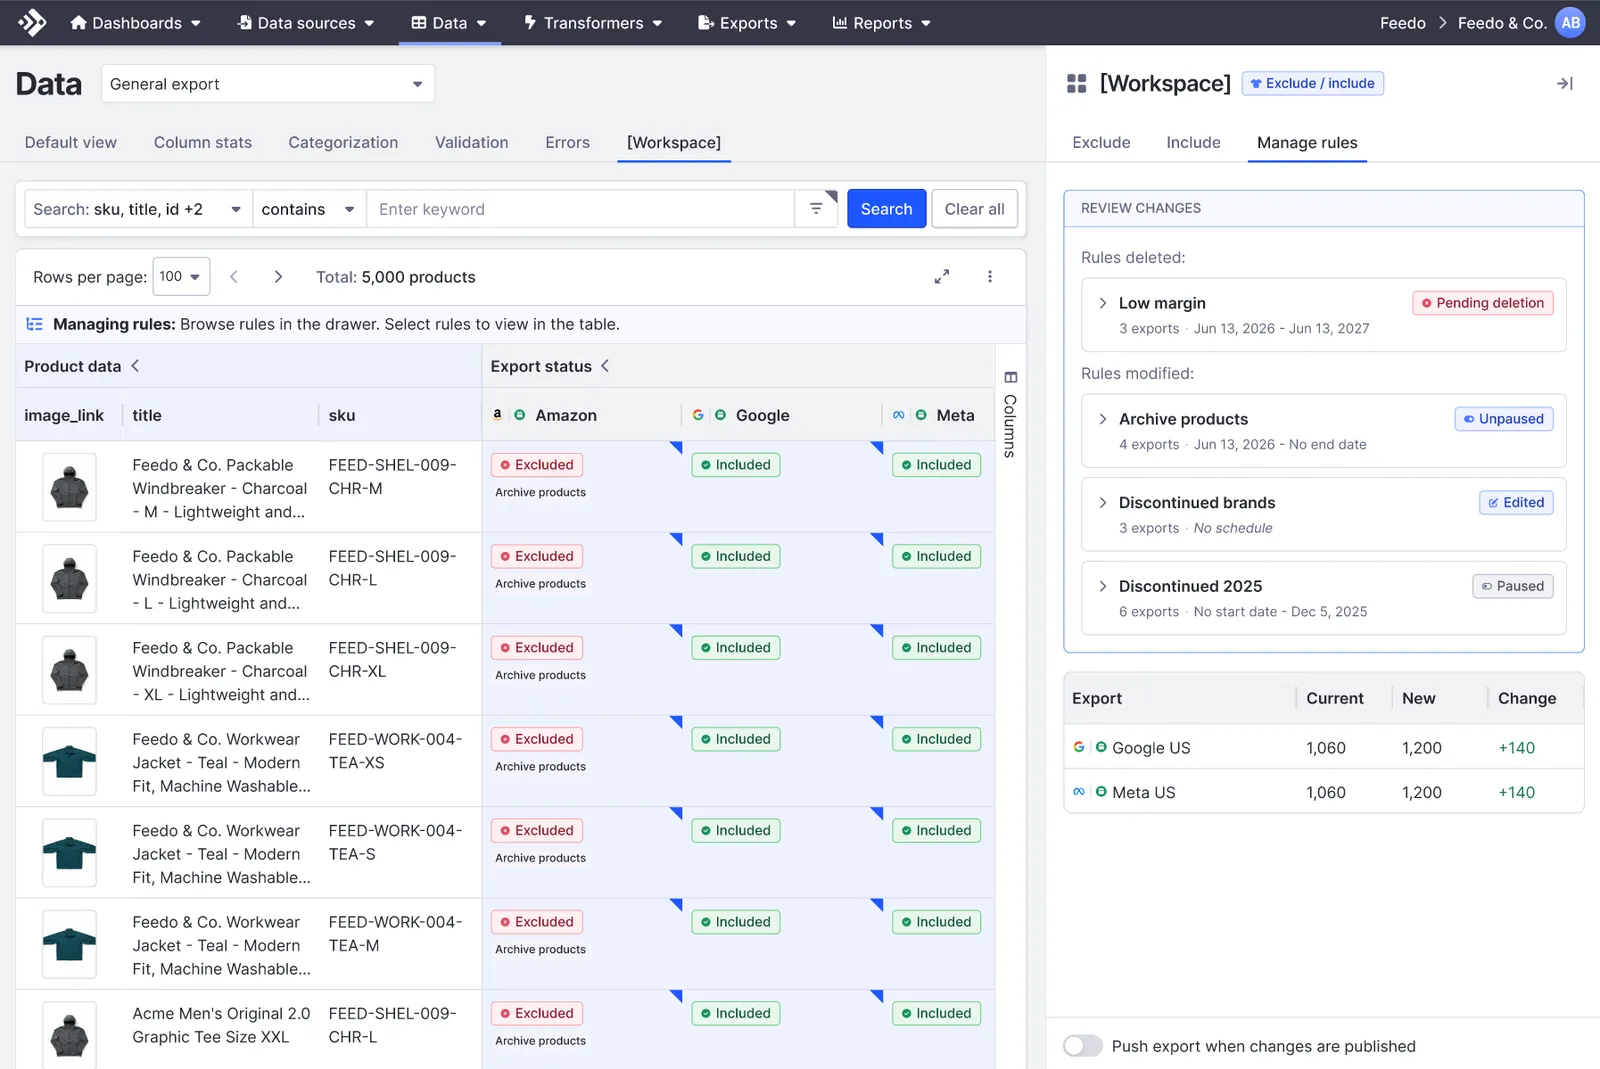
Use the review changes panel to see the current count, new count, and change for every export before anything goes live. The count of products to be excluded updates live as you adjust your search filters or manually check and uncheck rows.
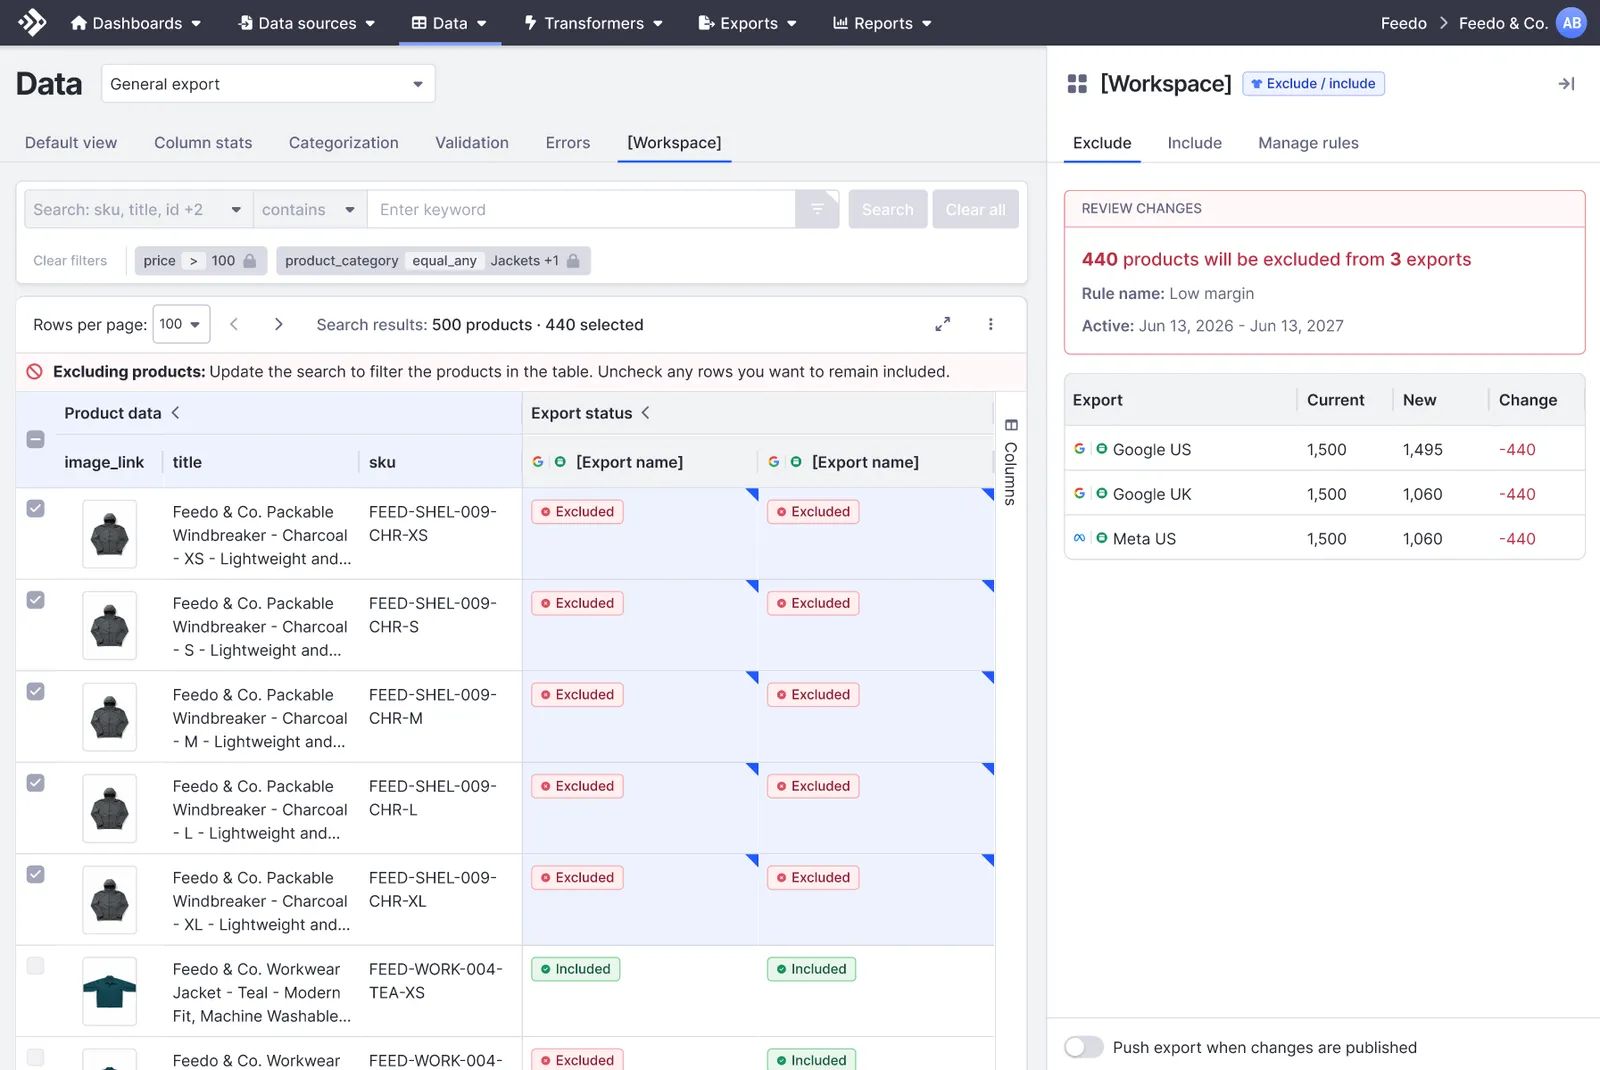
Turning the Push export when changes are published toggle on means both happen at once: the moment you select Save Changes, your export runs too. Leaving it off (the default) means your changes are saved, but you’ll need to wait for the export’s next scheduled run before your products actually update.
Include products
Including reintroduces products by creating an exception to the exclusion rules already in place. You don’t need to track down and disable each rule individually.
Review current status
Some products may be excluded in certain exports and included in others. The table shows each product’s current status across every export you’ve selected.
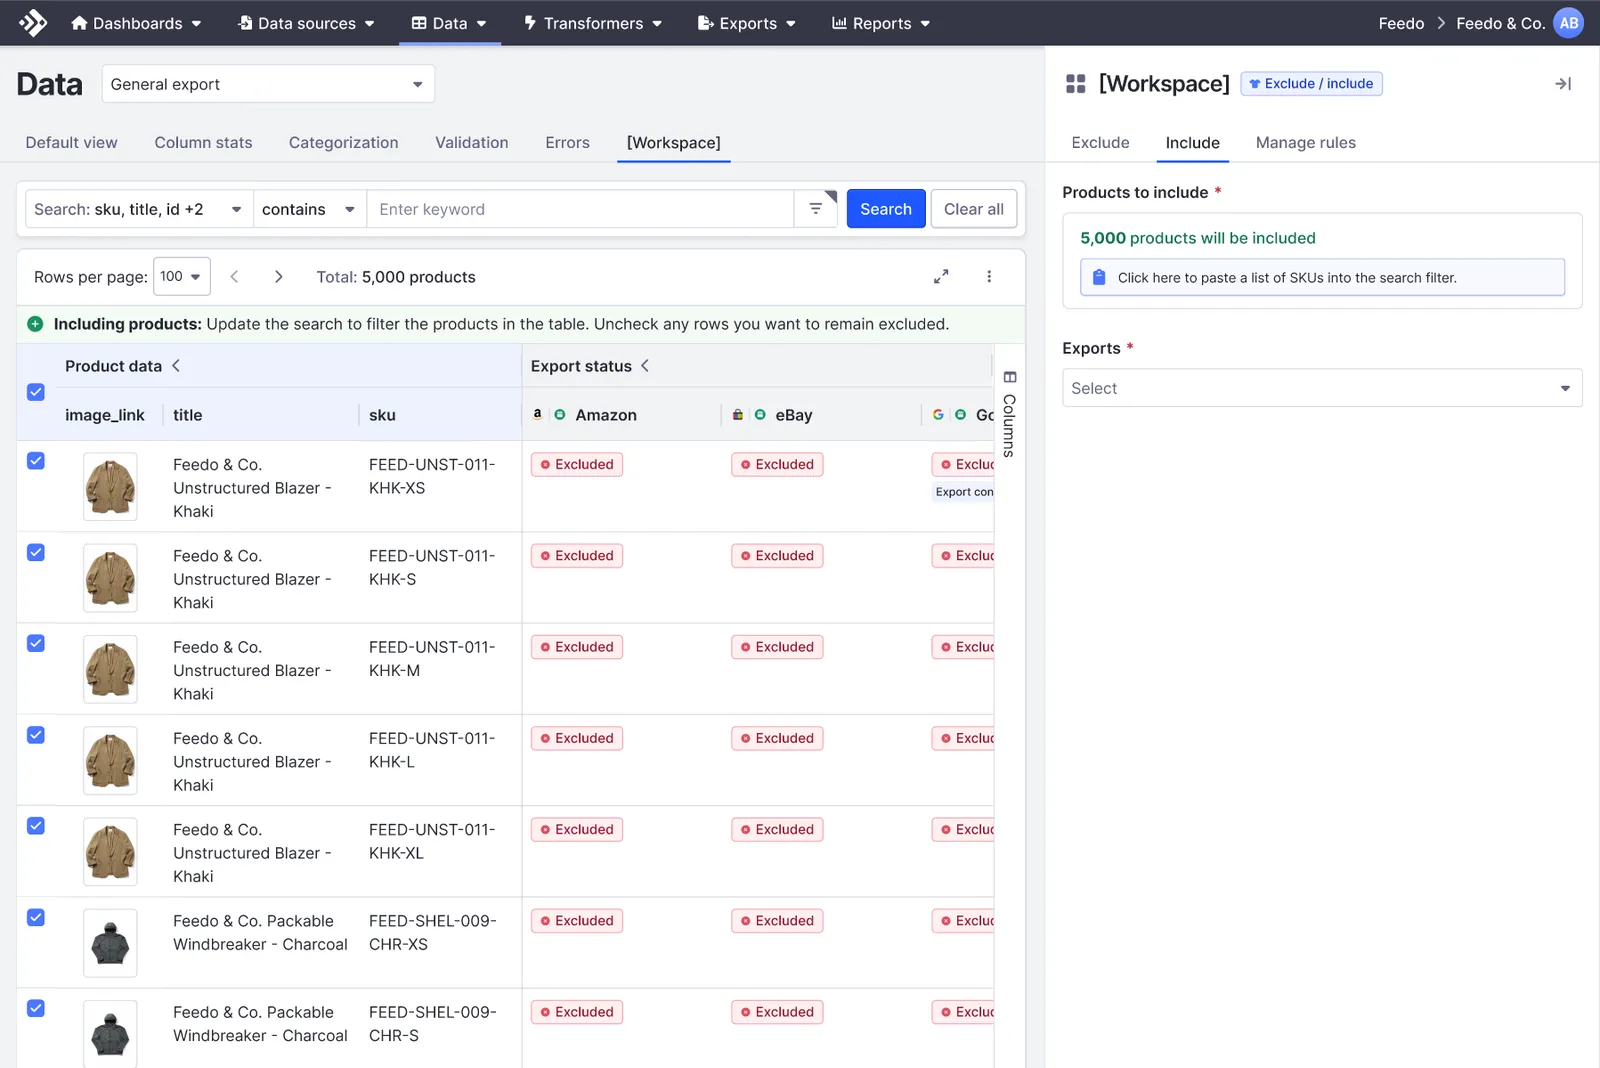
Narrow your list
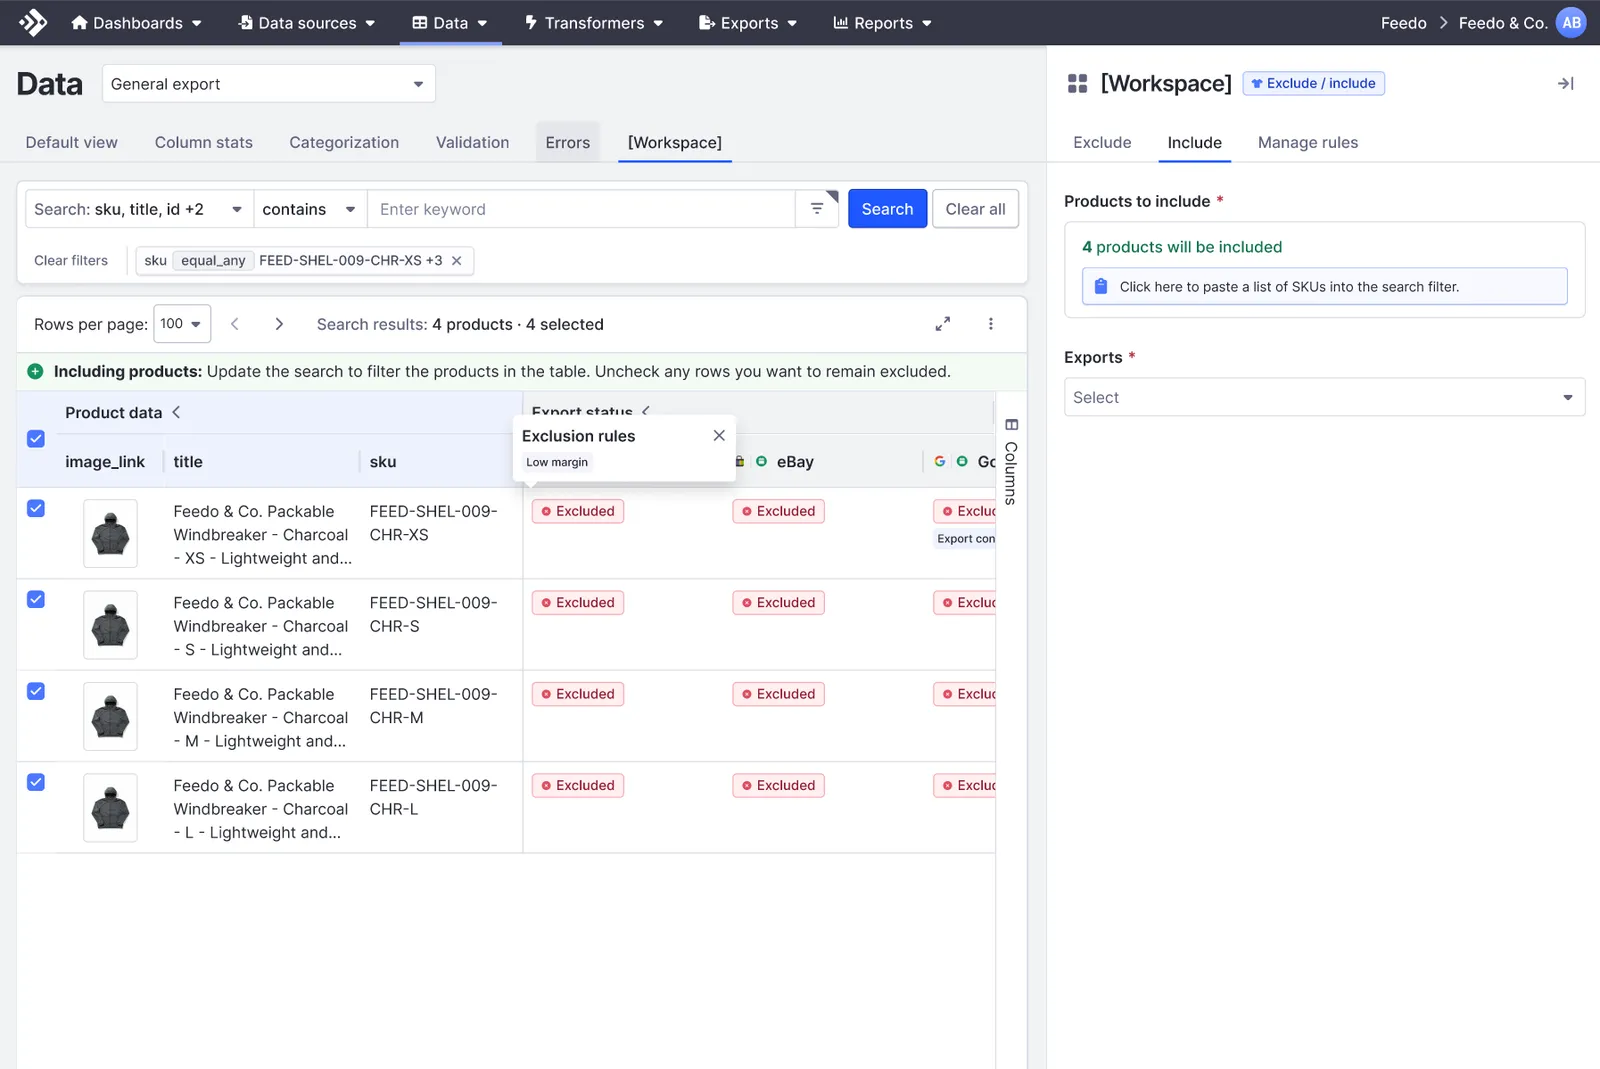
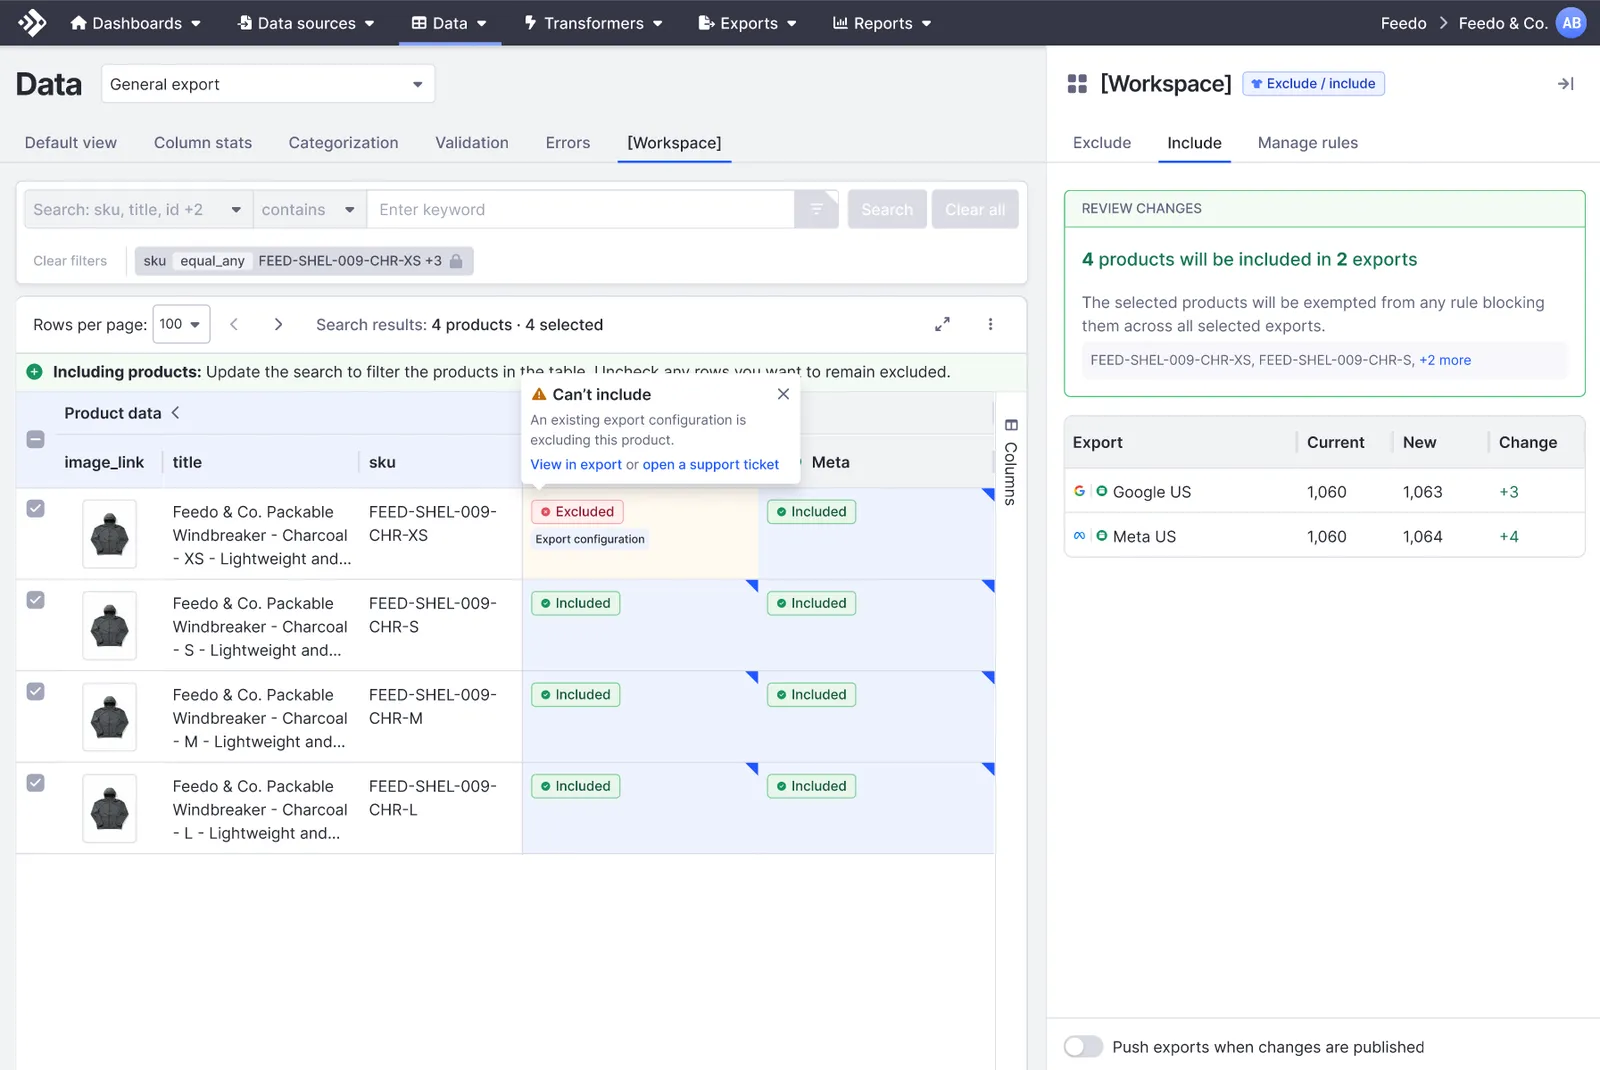
Filter with a SKU list or search query. Hover over an Excluded status to see exactly which rule is blocking it. Hovering surfaces the specific exclusion rule by name, like “Low margin,” so you know what you’re about to override before you include the product.
Select the exports
Choose the export(s) you want to reintroduce the products to. The table updates to show current status for each one.
Preview the change
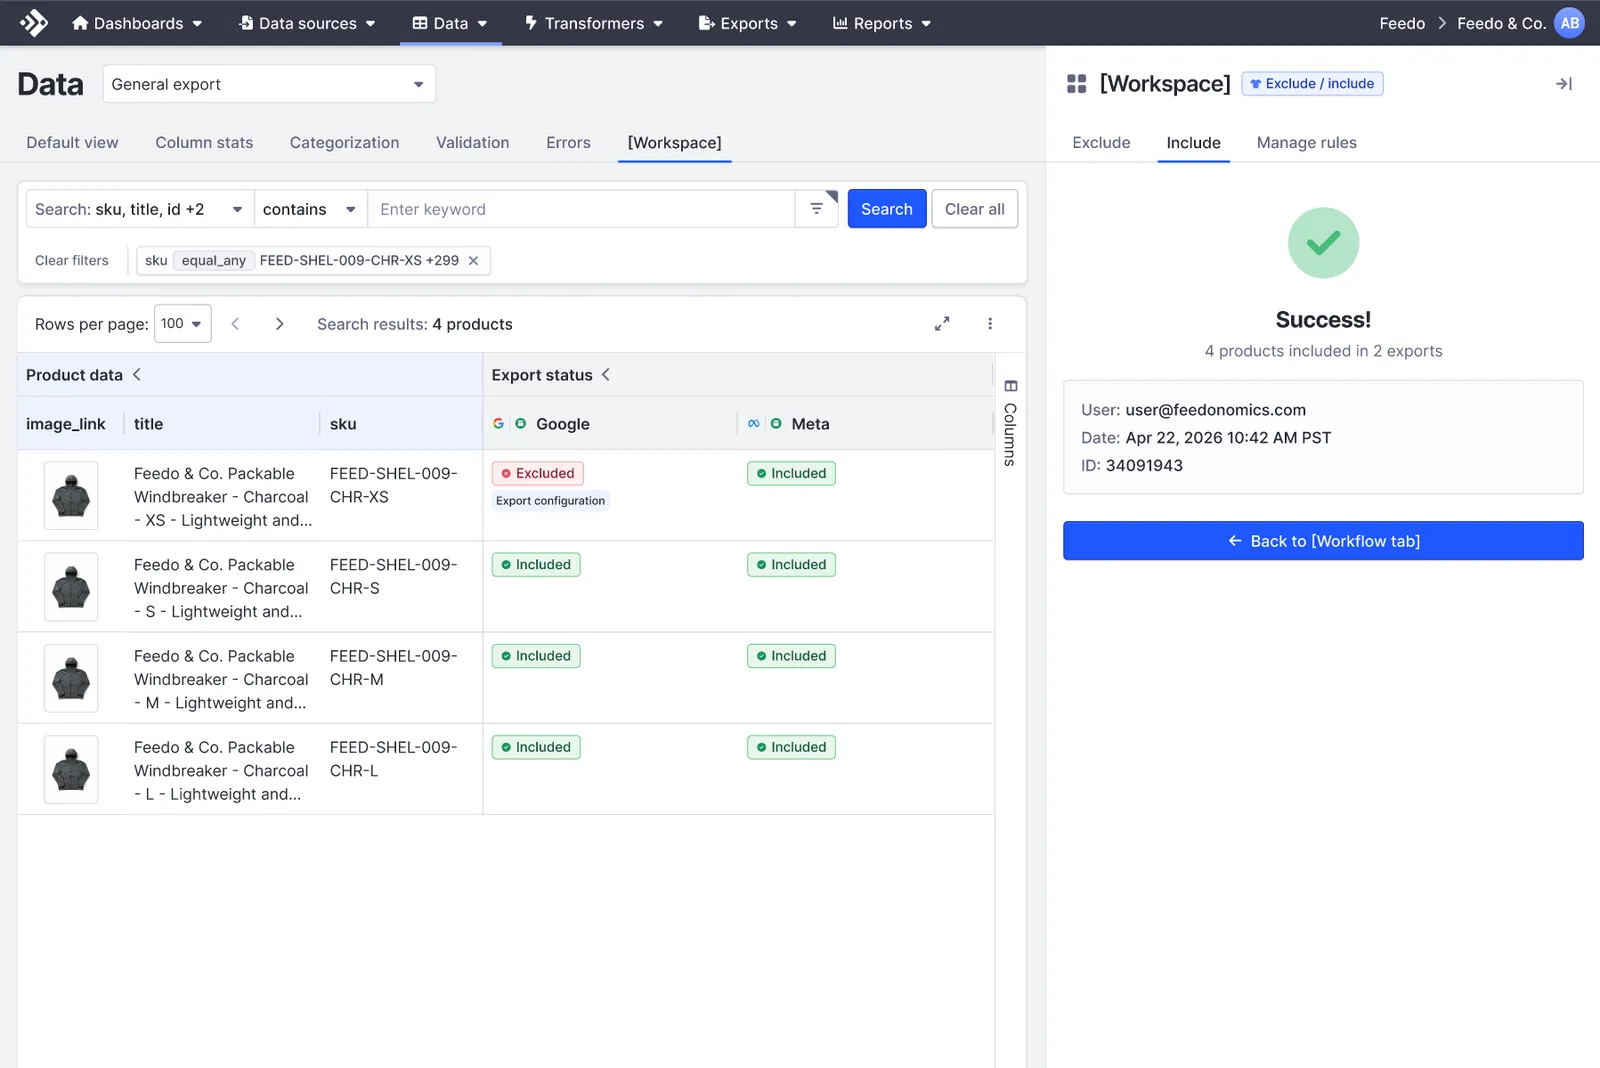
Preview the before-and-after count for every export, plus the exact products affected, before anything goes live. If a product’s status can’t be changed, check whether it’s blocked by an export configuration instead of an exclusion rule. See See why a product is excluded.
See why a product is excluded
If a product isn’t showing up where you expect, the workspace shows a layered trace of everything currently affecting it. Not every red status can be cleared by including the product, though.
If a product’s status can’t be changed, an Export If condition on the export itself is blocking it, not a rule you created. These are conditions set directly on the export (for example, requiring that price isn’t blank), and they can be different for every export. Include can’t override them. Use View in export to check the export’s Exclusions settings, or open a FeedSupport ticket if you need help resolving it.
To investigate yourself:
Manage rules
You can manage the exclusion rules you’ve created from the Manage Rules tab. There’s no need to rebuild anything from scratch if plans change.
Open Manage Rules
See every exclusion rule created for the database or export at a glance: active, paused, expired, or marked for deletion.
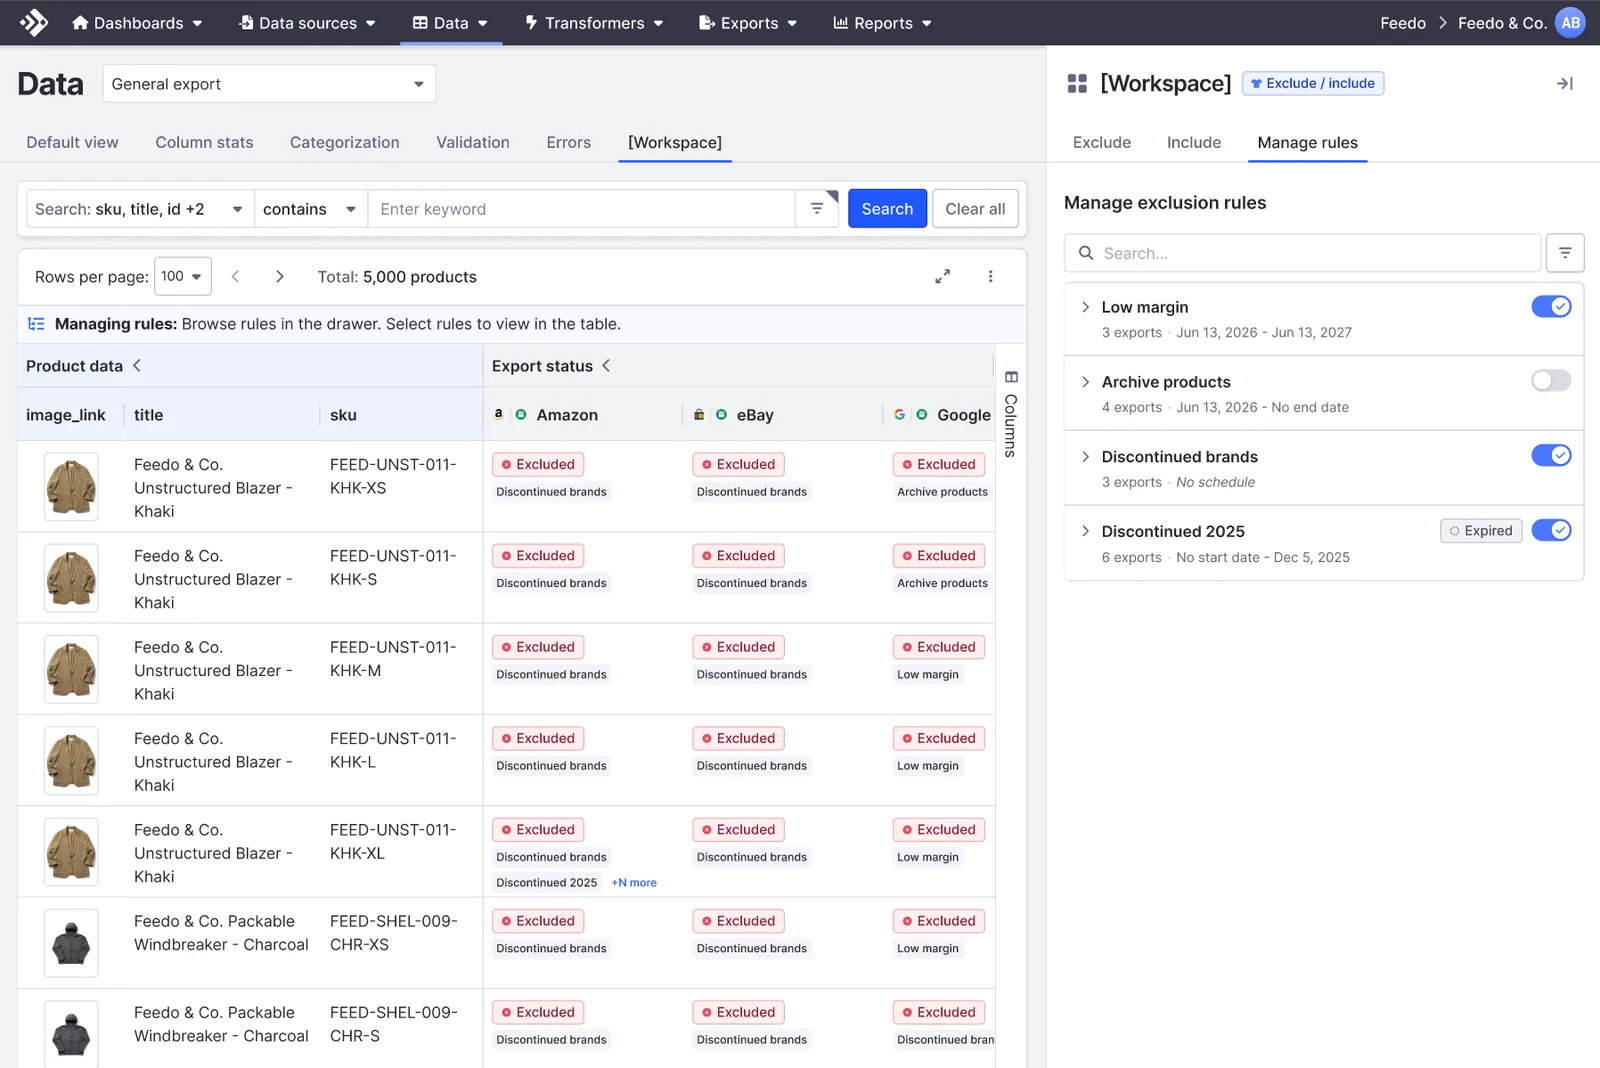
Toggle a rule on or off
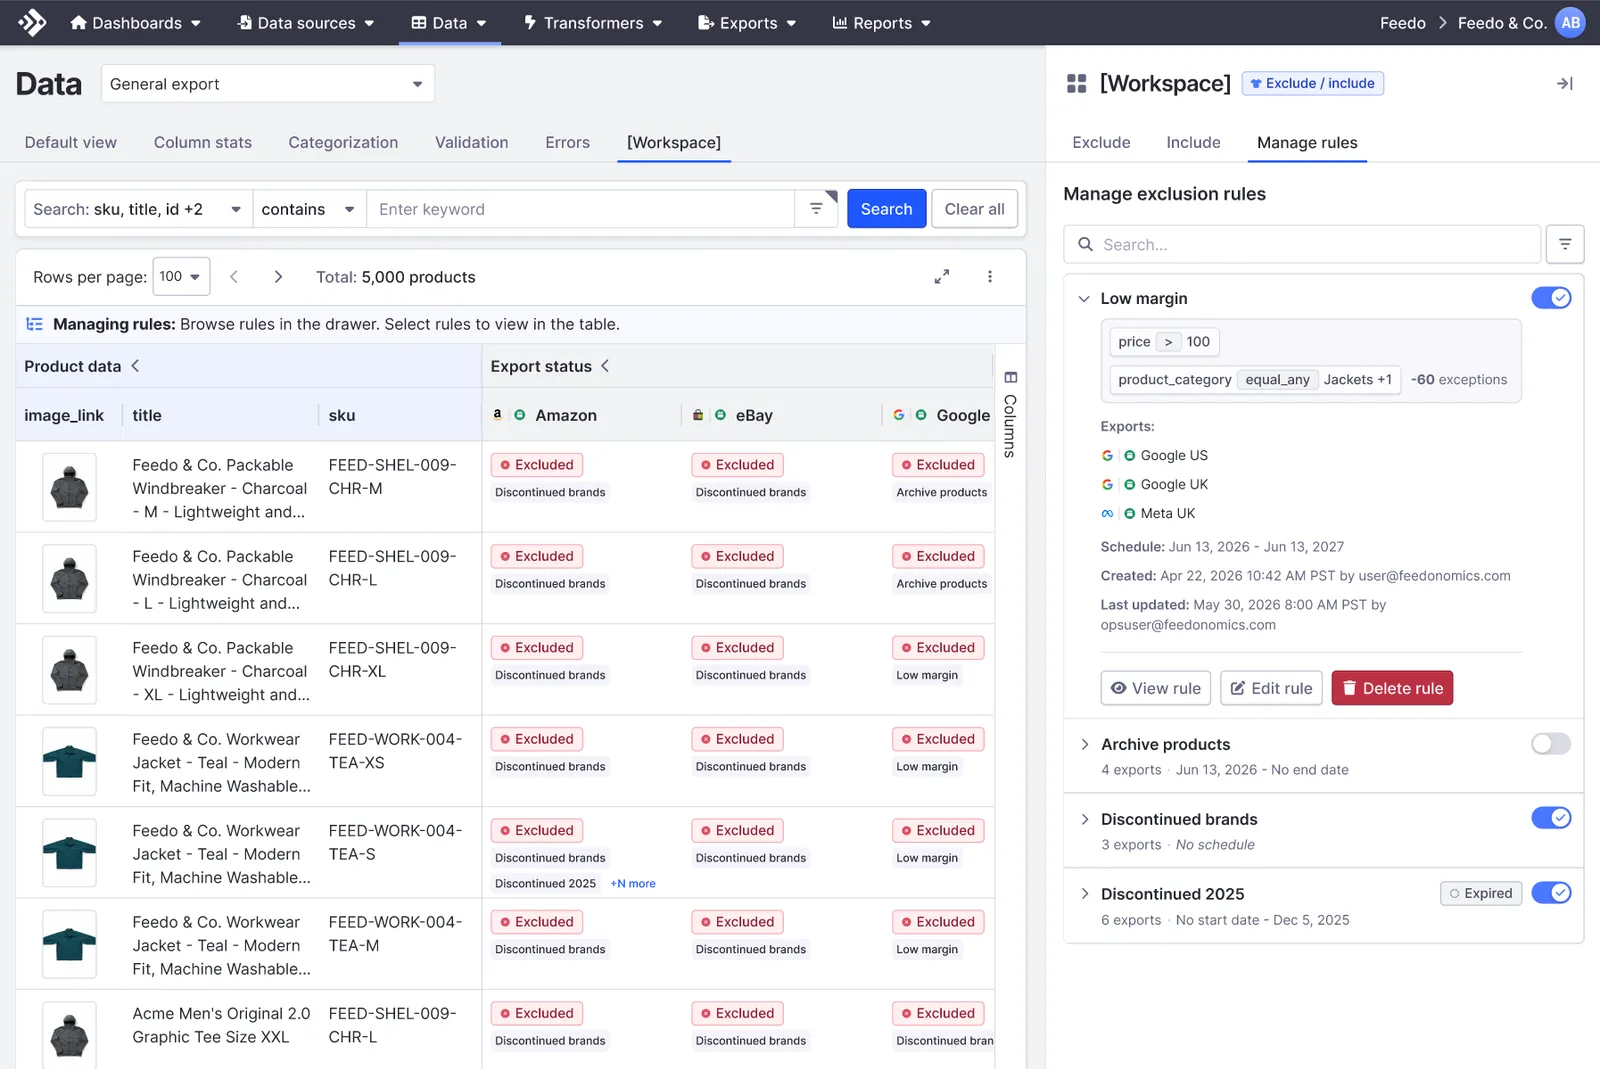
Expand a rule to see its full criteria and exports, and flip its toggle to preview the impact before you save.
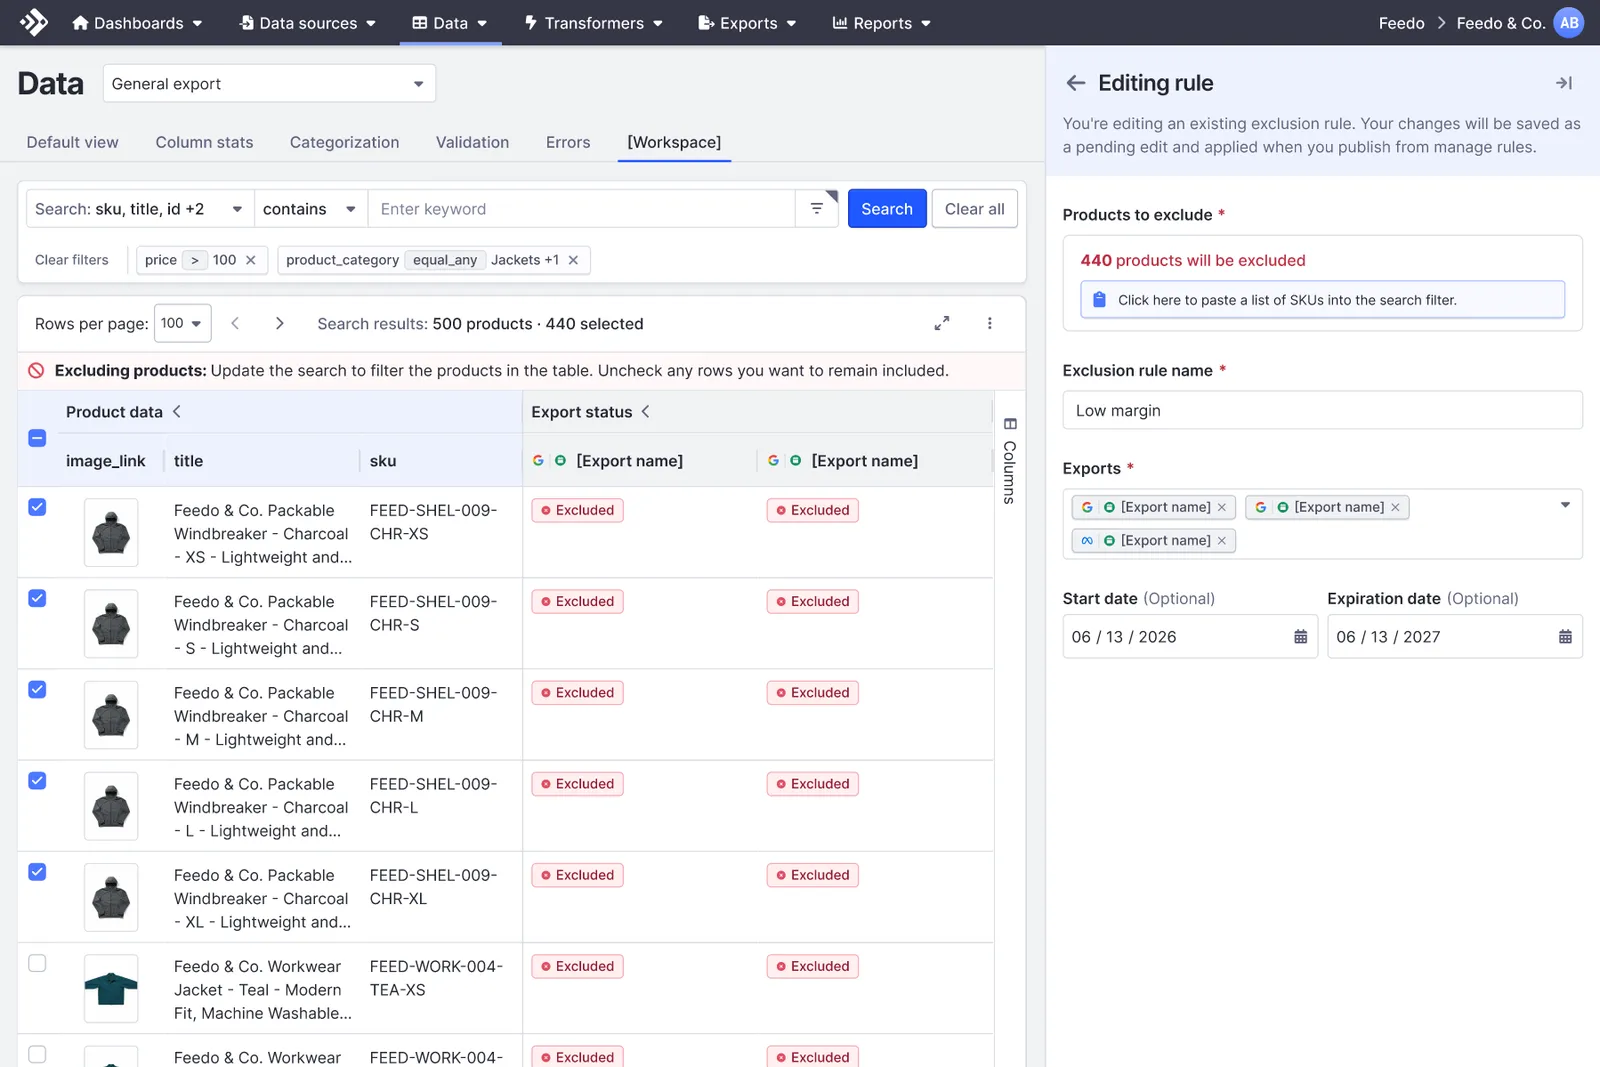
Edits are saved as a pending change and only go live once you publish from Manage Rules. A rule that’s been edited but not yet published shows a blue Edited tag in its top-right corner, so you can see at a glance which rules have pending changes. Every change here updates the draft immediately, so you always see the downstream impact before publishing.
Publish changes
Once you’ve reviewed a draft, you decide when it goes live.
Choose when to publish
Publish the export immediately, or leave it to run on its next scheduled cycle (the default). When multiple rules change at once, the review panel groups everything, deleted, modified, and unchanged, with the same before/after table and a toggle to push the export now or wait for its next run.
Get help
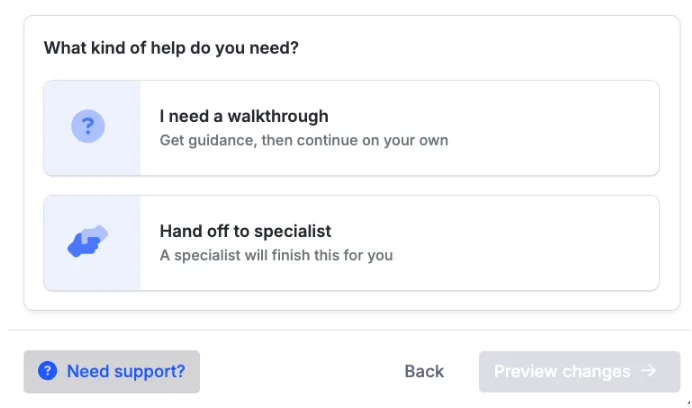
Most changes covered in this guide, such as excluding products, reintroducing them, and managing existing rules, can be done yourself directly in the workspace. If you hit something the workspace can’t resolve, like a product still blocked by a destination requirement, a Support Specialist can pick it up from exactly where you left off.
This guide is a general reference. Specific steps or available options may vary slightly depending on your account setup.