
Your first enrichment run
This guide takes you through one small enrichment run from start to finish. Follow it with 25–50 products rather than your whole catalog — the goal of a first run isn’t volume, it’s learning what the output looks like for your products before you commit real allotment to it.
Budget about 30 minutes of your own time, most of it spent writing your brand voice input and reviewing results.
Before you start
Have these ready:
- A small, representative product set. One category works best — it keeps the batch coherent enough that your config can be specific about it. Pick products with reasonably complete source data; a first run on your thinnest products will teach you the wrong lesson. Background on scoping a batch: Enrichment strategy.
- Something that describes your brand voice. A style guide, an existing product page you’re proud of, or fifteen minutes to answer the questions on the brand voice page. This is the input that most affects your results.
- Your target keywords (optional). A
.csvor.txtof real search terms if you have them. - Access to enrichment in your FDX account, with an allotment available. Making changes to data requires Write access or higher on your account; see User Access Control for the access levels and who can grant them.
Run it
Open enrichment and select your products
In the Data area, open the Enrichment tab (next to Default view and Column stats).
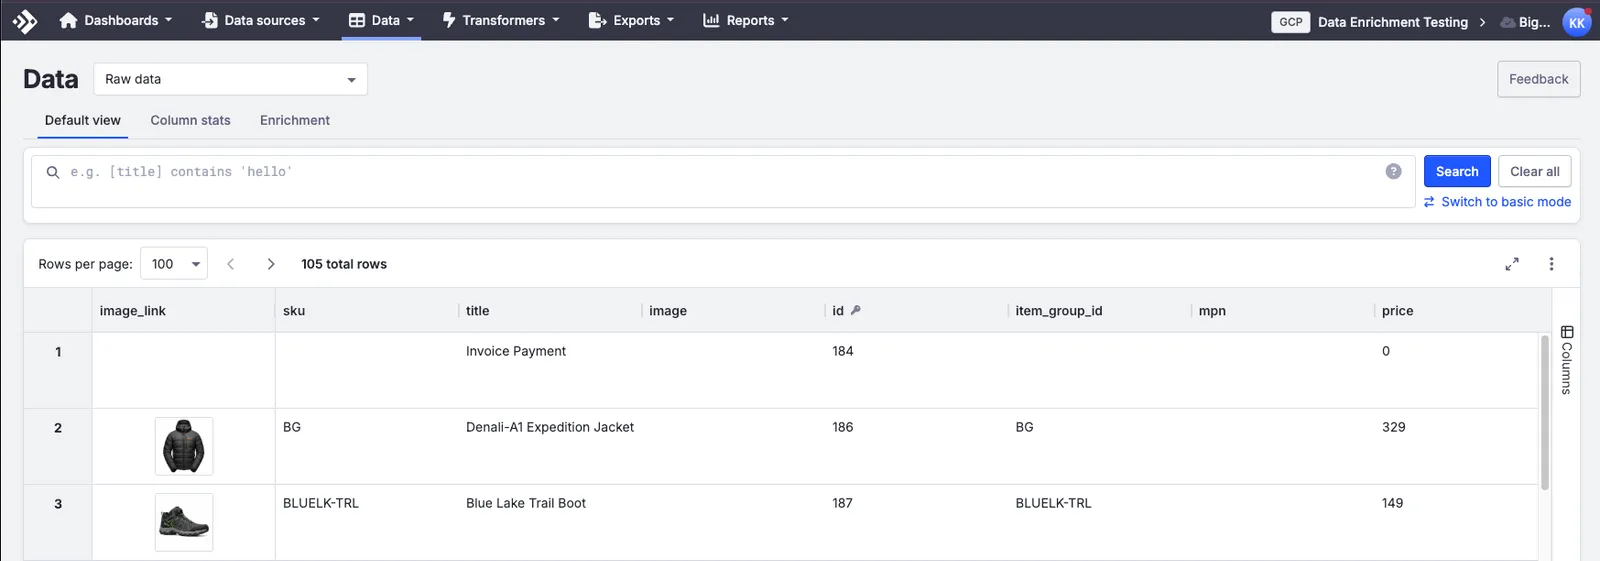
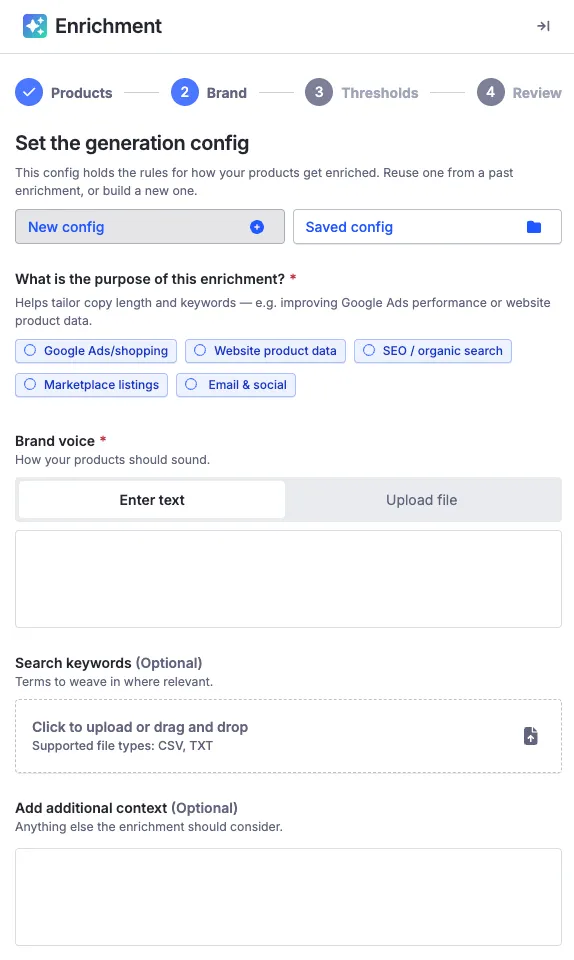
The enrichment panel opens on the right and walks you through four steps: Products → Brand → Thresholds → Review. It enriches the products currently shown in the data table, so filter the table down to the 25–50 products you picked — everything in a batch is enriched with the same config, so keep the set coherent.
Choose product or variant level
For a first run, choose product level unless your variants have genuinely different stories to tell. It’s the cheaper choice and it keeps your review simple. See Product level or variant level.
Create your config
Work through the setup inputs: your purpose (what you’re optimizing for), your brand voice, your keywords, and any additional context. Be specific — “warm and plain-spoken, never uses exclamation points, says sofa not couch” produces noticeably better output than “friendly.” Inputs and what happens to them explains what each one affects.
You’ll get back a plain-English summary of what the config will do. Read it. If it doesn’t describe what you expected, your inputs need sharpening before you spend a run finding that out.
Check the cost panel
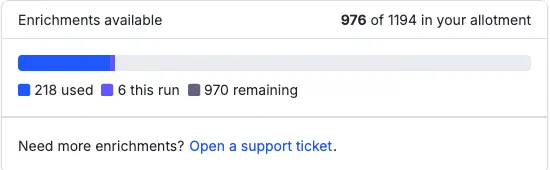
Confirm what this batch will consume against your remaining allotment. Every item you send counts, whether or not you accept the result.
Set your quality threshold
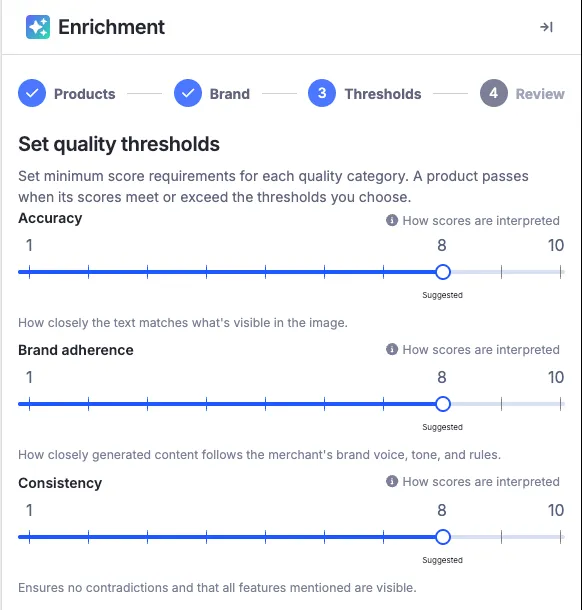
You set a minimum score per quality category — accuracy, brand adherence, and consistency — and a product passes when its scores meet your thresholds. Start strict on a first run: holding more products for review is exactly what you want right now, because you’re here to look at the output, not to auto-approve it.
Run it
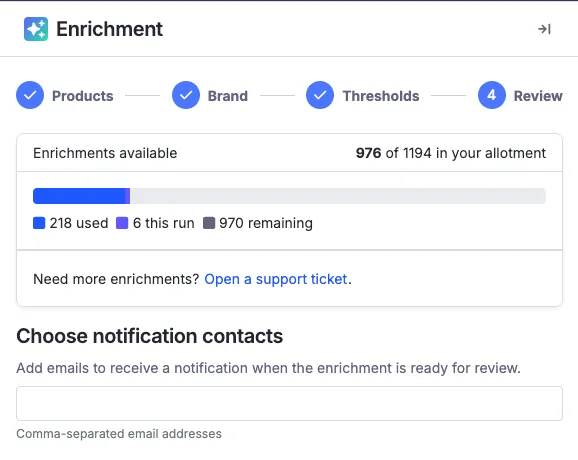
The Review step recaps your allotment and lets you add notification emails — you’ll be notified when the enrichment is ready for review, so you don’t have to stay on the screen. Then run it.
Review the scorecard
This is the part that matters. When the run completes, the panel shows the batch result — pass rate, average score, and how many products need review — and each row carries its enrichment status.
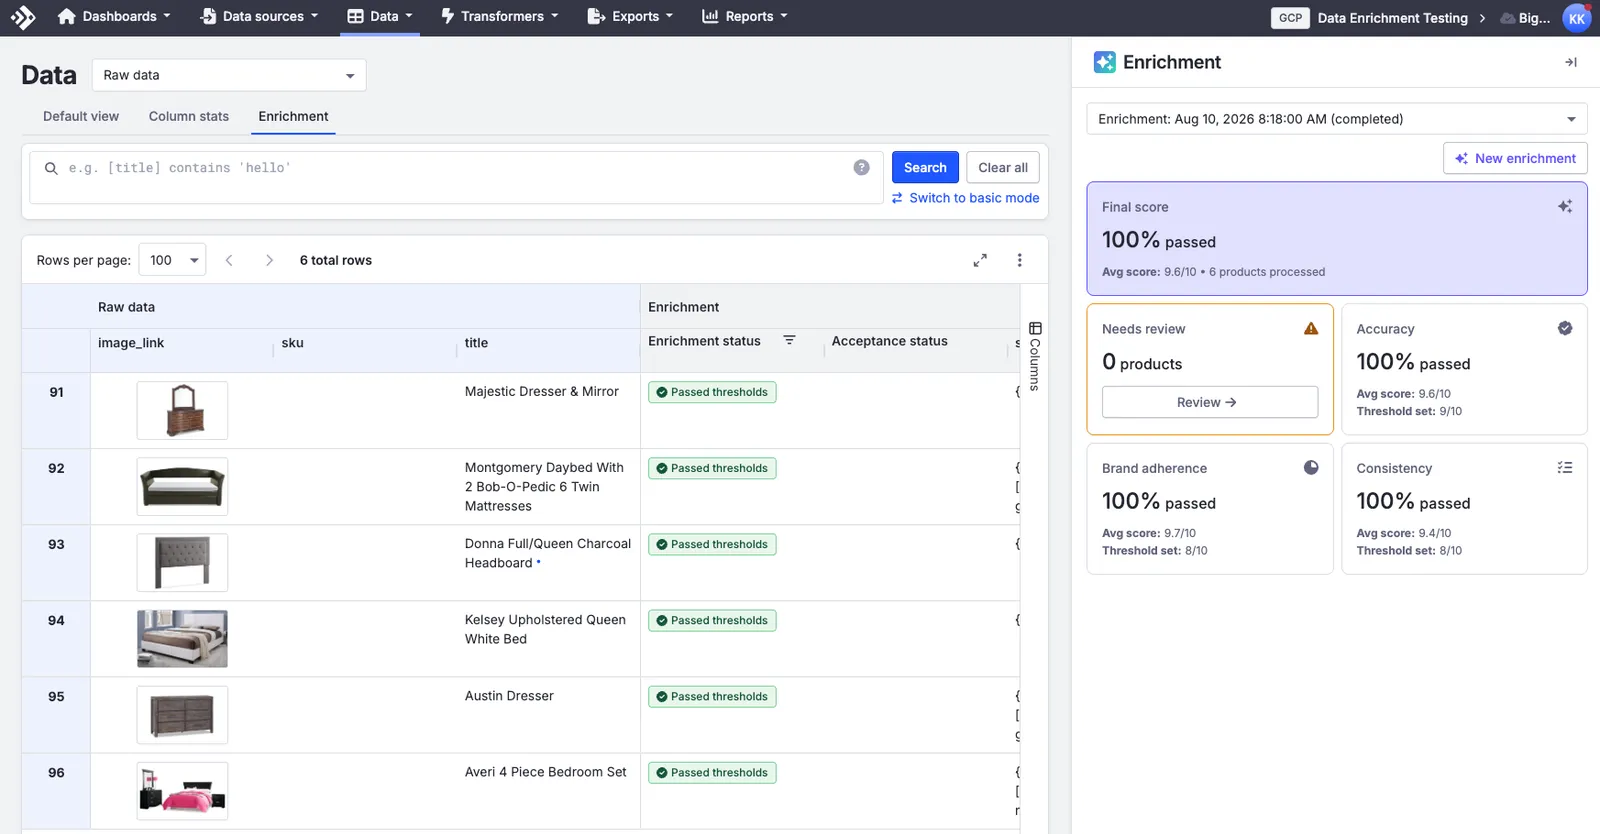
For each product you’ll see the enriched content beside your original data, a quality score, and any specific issues that were flagged.
Read ten or fifteen of them properly — including a couple that scored well and a couple that were held back. You’re calibrating your own judgment against the scores.
Accept a few and reject a few
Practice both. Accept the results you’d genuinely ship and reject the ones you wouldn’t. Nothing about your source catalog changes either way — accepted content is applied as a raw data override alongside your imported data.
Check the built output
Accepted content goes into its own new fields, so your live feeds don’t change yet — that’s expected. Look at the enriched values in your database next to the originals. Sending them to a channel is a separate, deliberate step: see Enrichment, transformers, and exports.
You’re done when
- You’ve seen enriched content next to your originals and have an opinion about it.
- You know roughly what score your catalog produces and what a held-back product looks like.
- You understand that the enriched fields are in your database but not yet in any feed — sending them to a channel is a separate step.
What to do next
If the output was close but the voice was off — that’s the most common first-run outcome, and it’s a config fix, not a product problem. Add specificity to your brand voice input, create a new config, and run the same sample again. See Re-running enrichments.
If individual products need small wording changes — you can adjust enriched content with transformers and transformed data overrides, the same tools you already use. See Editing enriched content.
If the output looked good — scale up gradually rather than all at once. Run a larger batch in the same category, then expand to other categories, checking that a config that worked on furniture also works on lighting.
Before you measure anything — connect your data sources, ideally before you roll enriched content out widely so you have a clean baseline. See Analytics onboarding.
The most convincing case for enrichment is a controlled test rather than a before/after chart. If you plan to make that case internally, set up a holdout group before you roll out — see A/B testing enriched content.
Stuck on something this guide didn’t cover? Check the FAQ.