
Google Promotions
Google Promotions brings Google Shopping promotion management into the self-managed workspace. Instead of routing every promotion request through a support ticket, you can create a Google Promotion, assign it to the right products, and track its status with Google directly in-platform, backed by a direct connection to the Google Merchant API.
Google Promotions are the sale badges and offer details Google displays alongside your products on Google Search, the Shopping tab, Chrome, and more. This workspace creates and manages the promotion itself and assigns it to products. It doesn’t edit your underlying Google Shopping product data source directly.
The feature lets you create a promotion through a guided form, assign it to products using the same search-and-select pattern as Exclude/Include Products and Custom Labels, preview exactly how many products will be assigned before anything is submitted, and track the promotion’s status and any Google errors, all in one place.
This guide walks through how to create a promotion, how to assign it to products, how to track its status with Google, and how to escalate to support when needed. Most of it you can do yourself. A Support Specialist is available if you’d rather have the team handle it.
Open the workspace
You can reach the workspace from the FeedSupport Portal by selecting the Promotions tile, or directly from the Workspace tab on your Data Page.
Select the Promotions tile
On the FeedSupport Portal home screen, select Promotions. It sits in the Feedonomics workspaces launcher alongside Exclude/Include Products, Custom Labels, and A/B Testing (coming soon). This opens the Feedonomics workspaces launch page with the Workflow already set to Promotions.
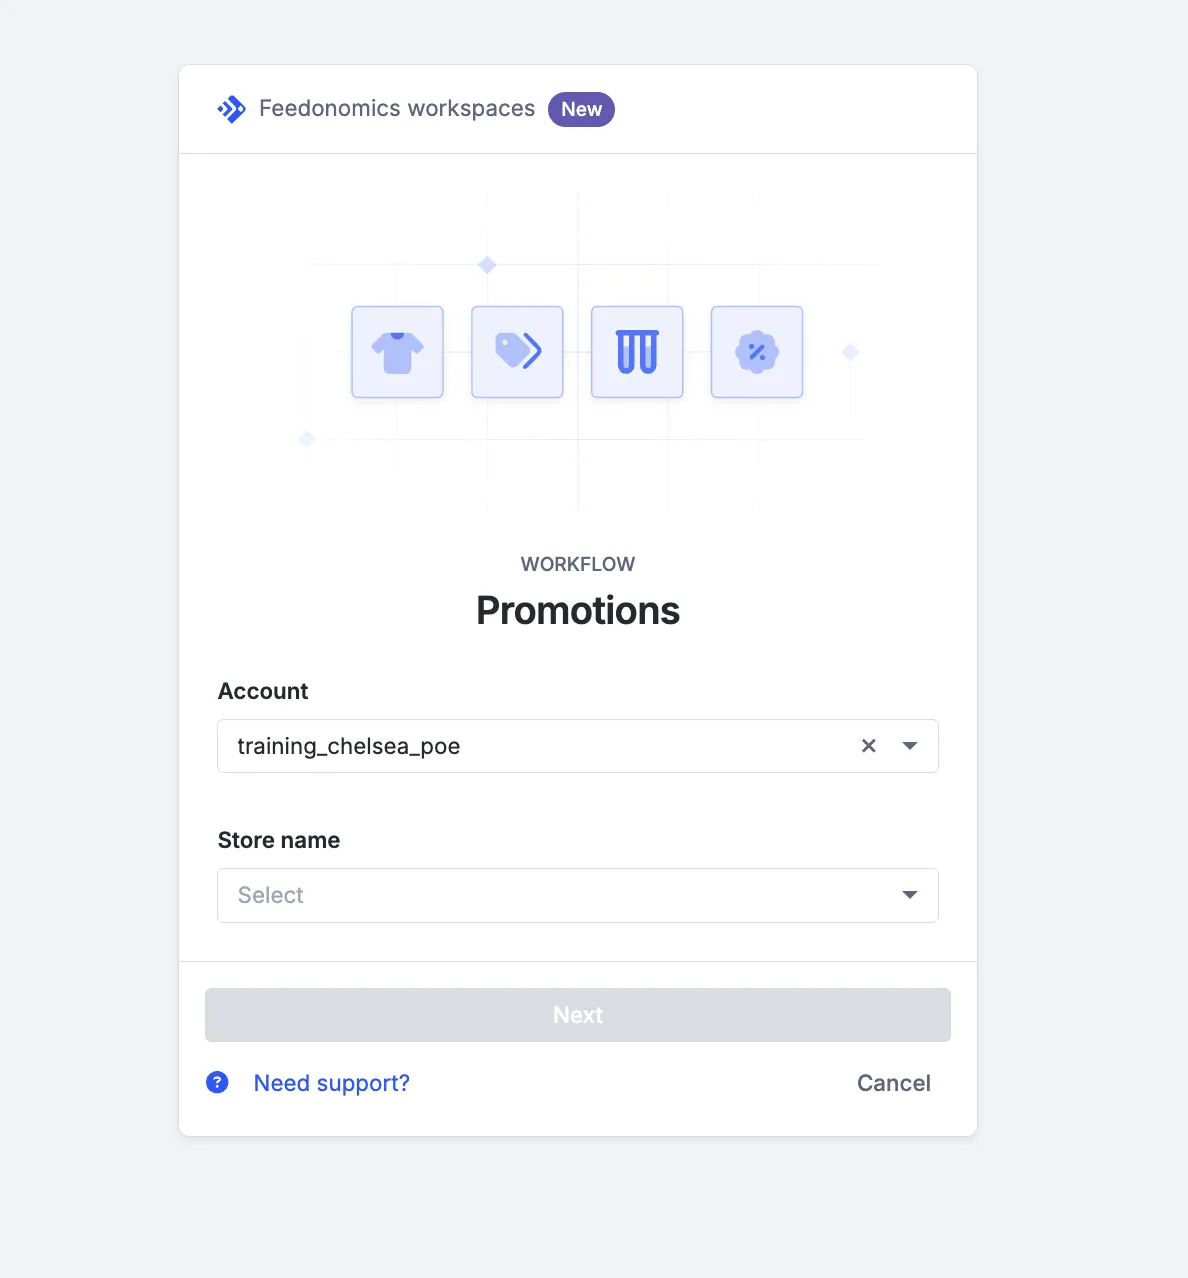
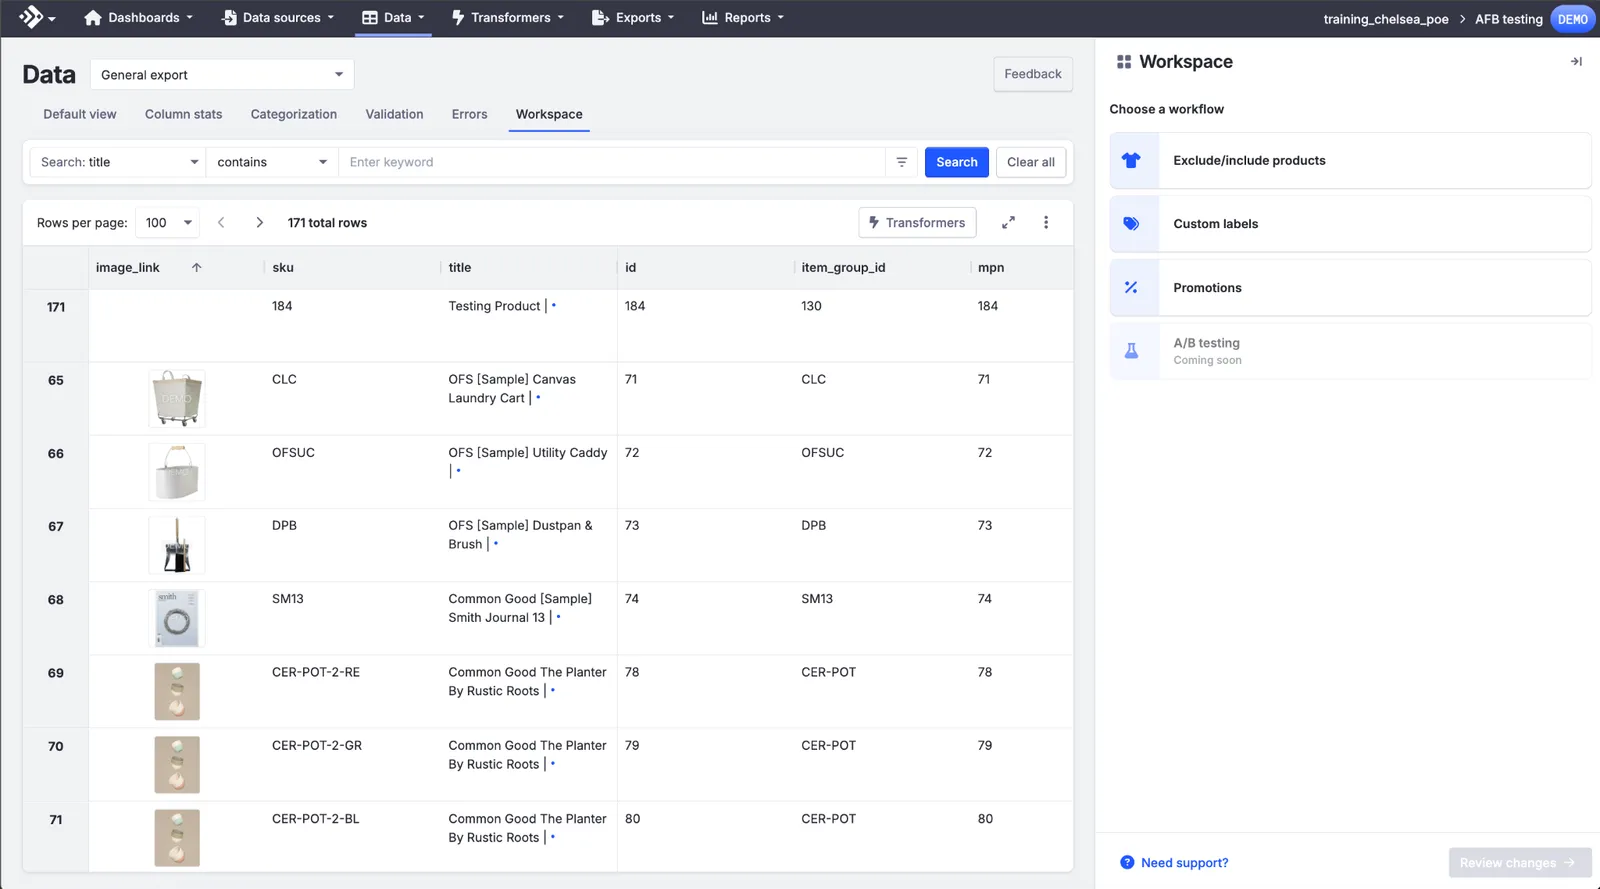
If you’re already on your Data Page, open the General Export view, select the Workspace tab, and choose Promotions. It appears as an active option alongside Exclude/Include Products and Custom Labels.
Before you start
Google Promotions has two requirements that must be met before you can submit a promotion. You’ll see both reflected at the top of the workflow, along with your export selection and Google connection status.
- Your database must have a Google Export connected.
- That Google Export must have Google authentication (OAuth) completed.
If either requirement isn’t met, the workflow blocks you from moving forward until it’s resolved. Reach out to a Support Specialist if you’re not sure how to connect or authenticate your Google Export.
The workflow at a glance
Creating and assigning a Google Promotion follows a slightly different order than Exclude/Include Products and Custom Labels: you choose your export first, then assign the products, and then define the promotion itself.
Use the Manage promotions tab to track the promotion’s status with Google and see any errors. See Track status and resolve errors.
Select your export
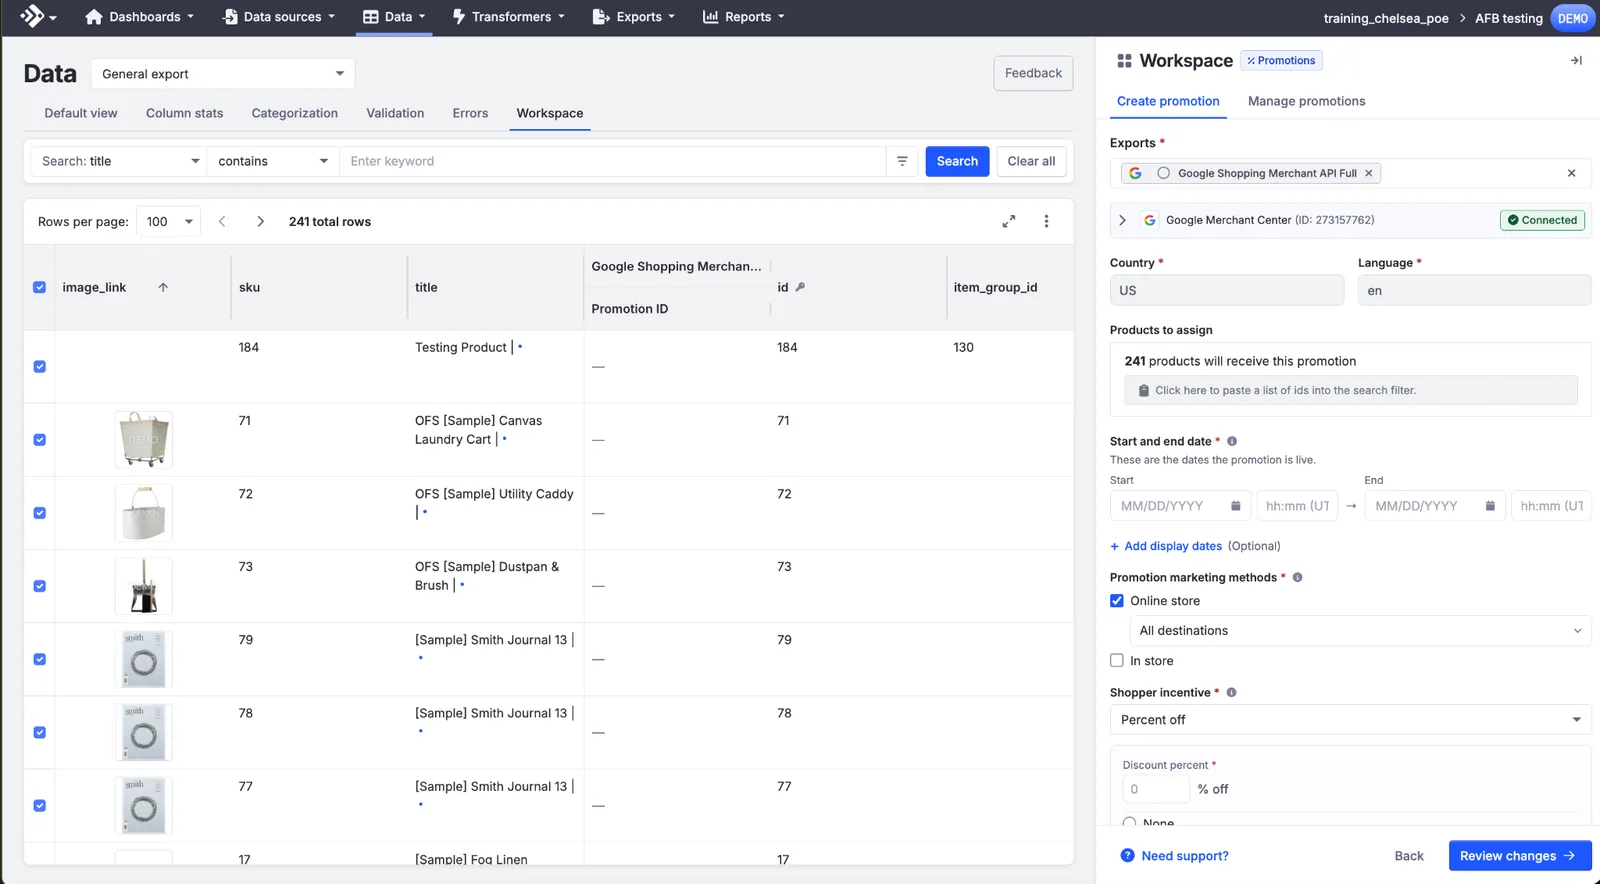
Start by choosing where the promotion will run. Open the Create promotion tab (the default view) and set:
- Exports: select the Google export(s) this promotion applies to. Only connected Google exports are selectable, and your export’s connection status shows inline.
- Country and Language: pre-populated from your Google export’s data source settings. If a database has more than one Google data source, you choose from a dropdown.
Assign products to the promotion
With your export selected, search and select the target products the same way you would in Exclude/Include Products or Custom Labels:
- SKU / ID list: paste a list directly into the search filter.
- Attribute or product-type filter: filter by brand, category, price, or other fields.
Create the promotion
Fill in the remaining fields Google requires to display the promotion:
- Promotion title: a customer-facing name for the promotion.
- Promotion ID: a unique identifier. Reuse an existing ID to assign more products to a promotion that’s already live, or enter a new one to start a new promotion.
- Start and end date: the dates the promotion is live.
- Promotion marketing methods: where the promotion applies. Choose online store (with a destinations dropdown), in store, or both.
Choose a shopper incentive
Shopper incentive is how the promotion is structured. Select an incentive type, and the fields below it change to match.
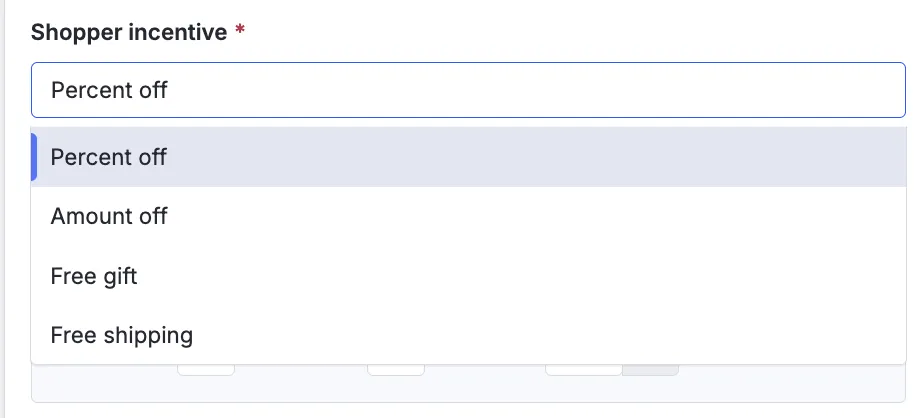
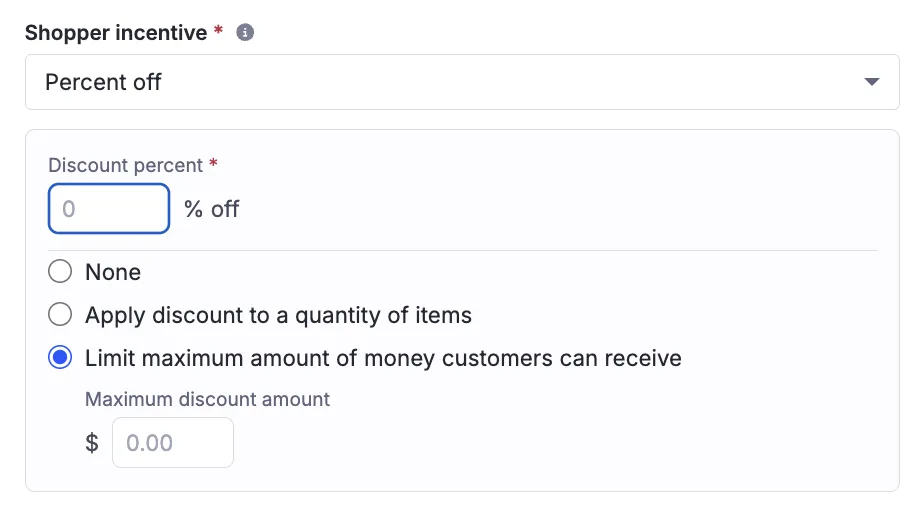
Percent off
Enter the percentage off. You can optionally apply the discount to a quantity of items, or limit the maximum amount of money customers can receive.
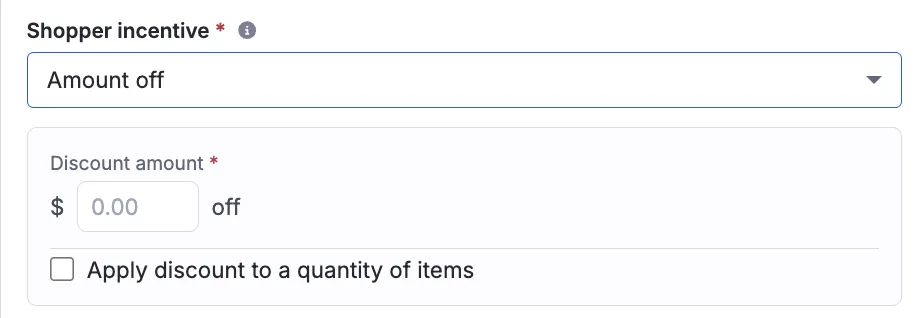
Amount off
Enter a fixed amount off, and optionally apply the discount to a quantity of items.
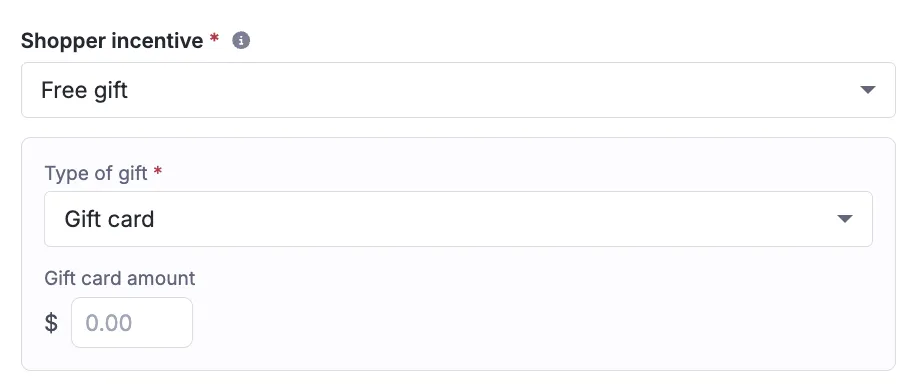
Free gift
Choose the type of gift: gift card or other. A gift card amount is required for gift cards. For other gifts, you can add an optional description.
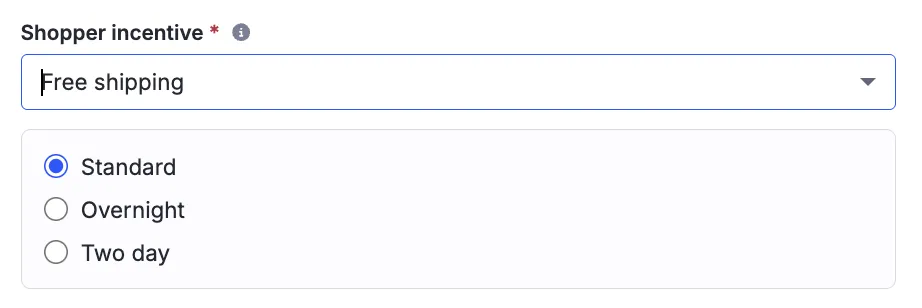
Free shipping
Select the delivery option the free shipping applies to: Standard, Overnight, or Two day.
Google doesn’t allow the following promotion types. A rejected promotion can’t be resubmitted, so check this list before you publish.
You can have up to 500 open promotions at any given time. If you’ve reached the open promotions limit, Google won’t approve additional promotions.
You can choose a same-day start date, but because of Google’s approval process, Feedonomics can’t guarantee a promotion goes live within 24 hours. As a best practice, choose a start date at least 2 days out, per Google’s guidance. If you need a promotion to go live in less than 24 hours, set it up directly in Google Merchant Center.
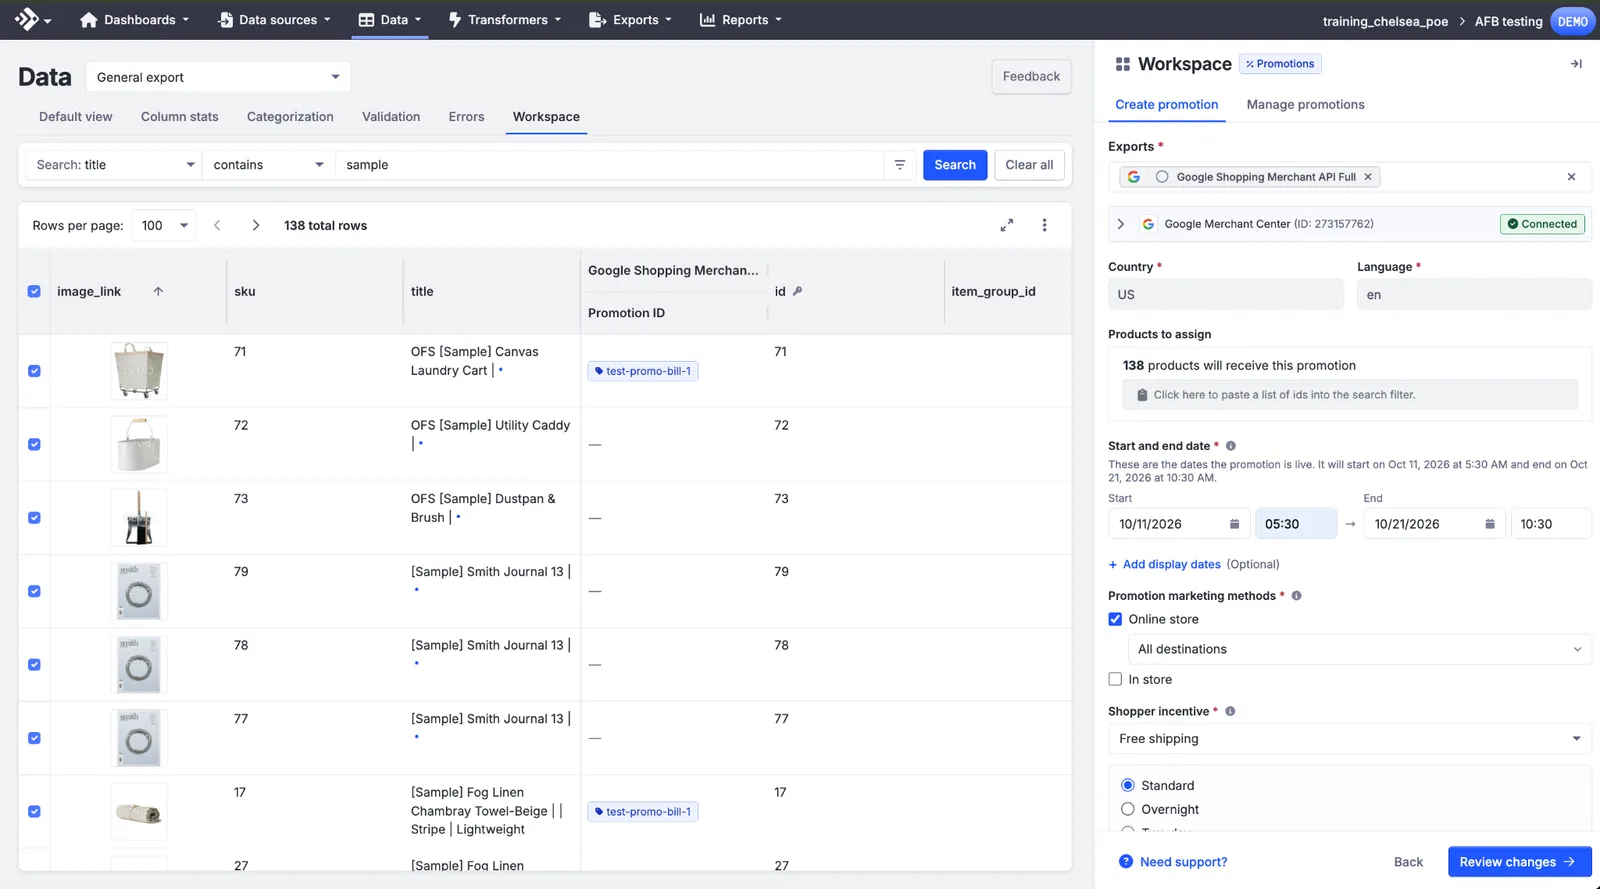
Select Review changes to move into preview mode.
Review the draft
The shared draft and preview step confirms the number of products the promotion will be assigned to, broken out per export. Products in export, already-assigned, and newly-assigned counts are shown separately so you can see exactly what will change.
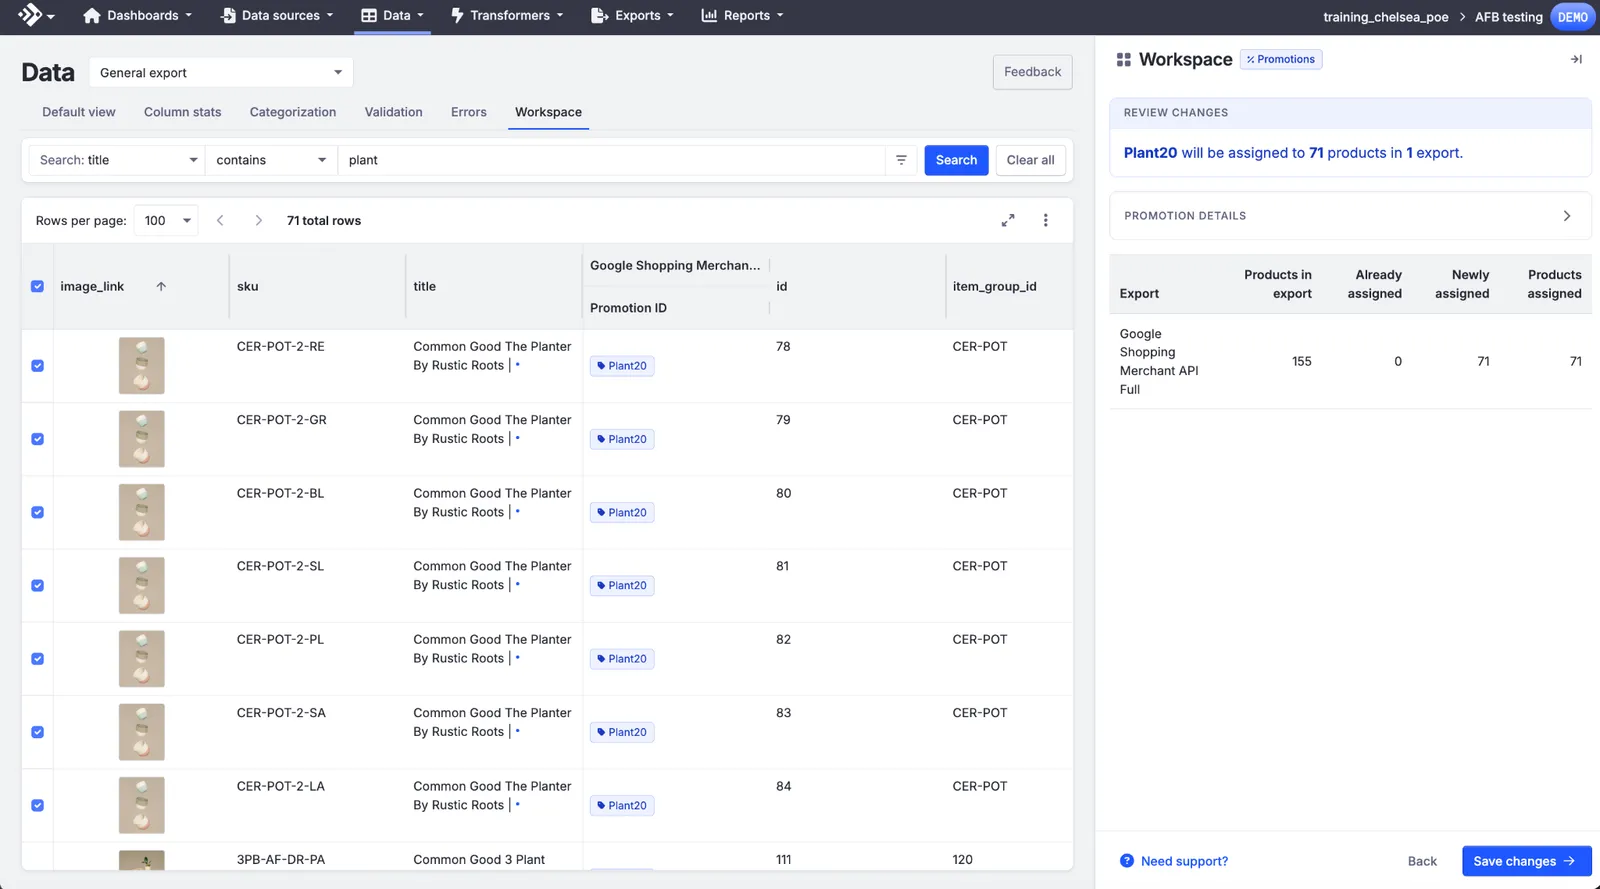
Publish
Select Save changes to apply the assignment and submit the promotion to Google for review.
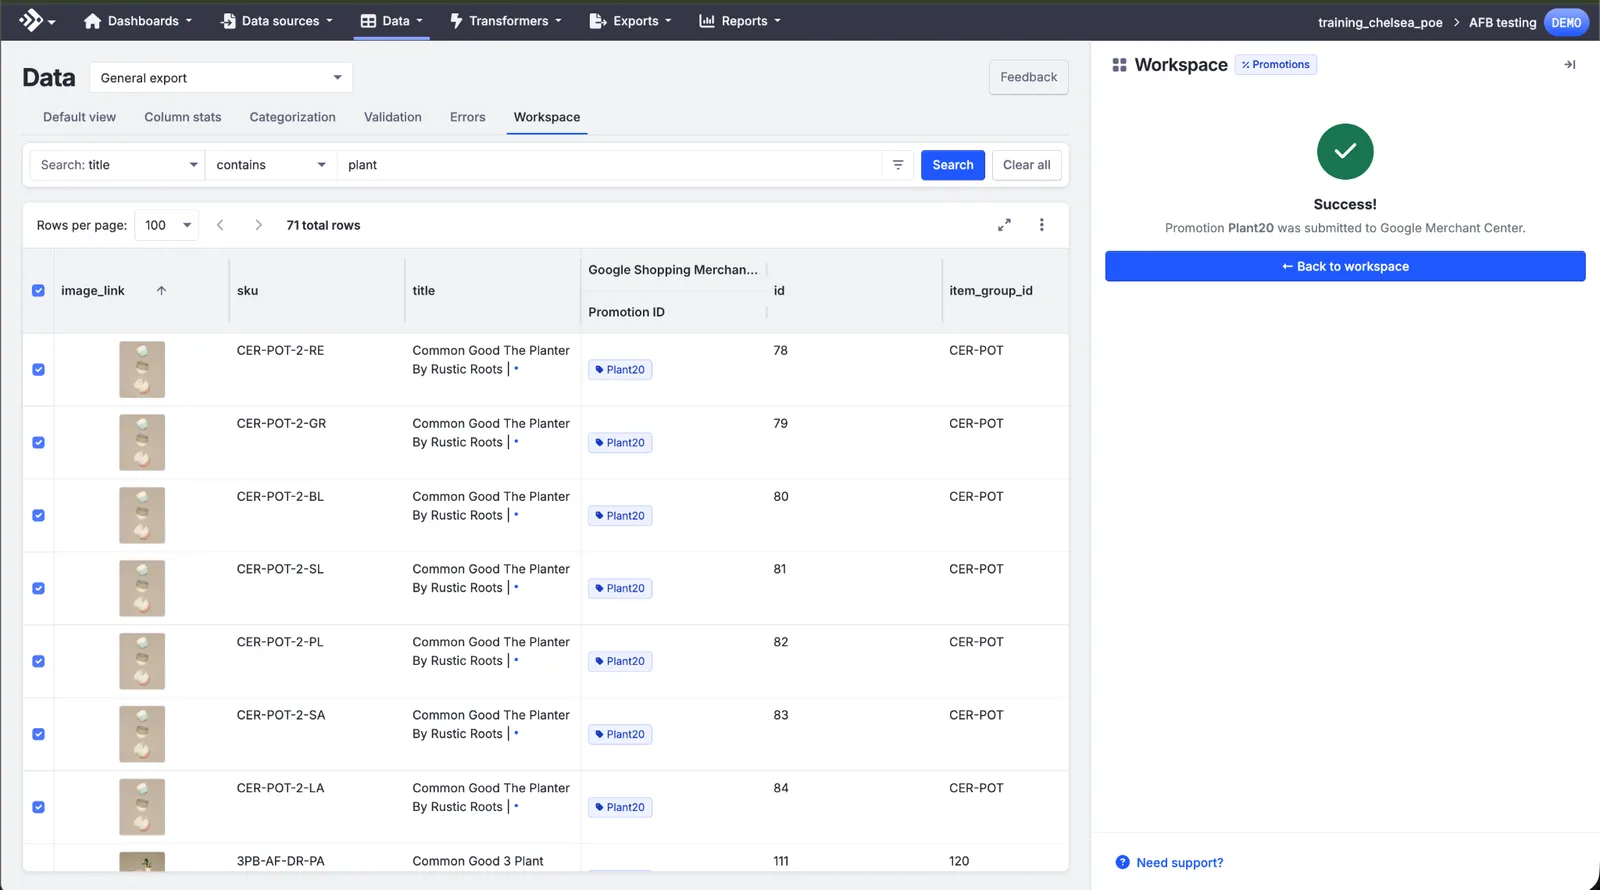
Track status and resolve errors
Because this workspace connects directly to the Google Merchant API, you don’t need to check Google’s own console to see where a promotion stands. Google moves every promotion through the following stages, and the platform keeps the status current automatically:
Google doesn’t support resubmitting a rejected promotion. If a promotion is rejected, create a new promotion with the corrected details rather than trying to edit and resubmit the old one.
Google’s policy and SKU review errors are retrieved through the Merchant API and shown directly on the promotion’s detail view in this workspace.
Manage your promotions
Open the Manage promotions tab to see every promotion created for a database, browse by Google export, and check each one’s live status.
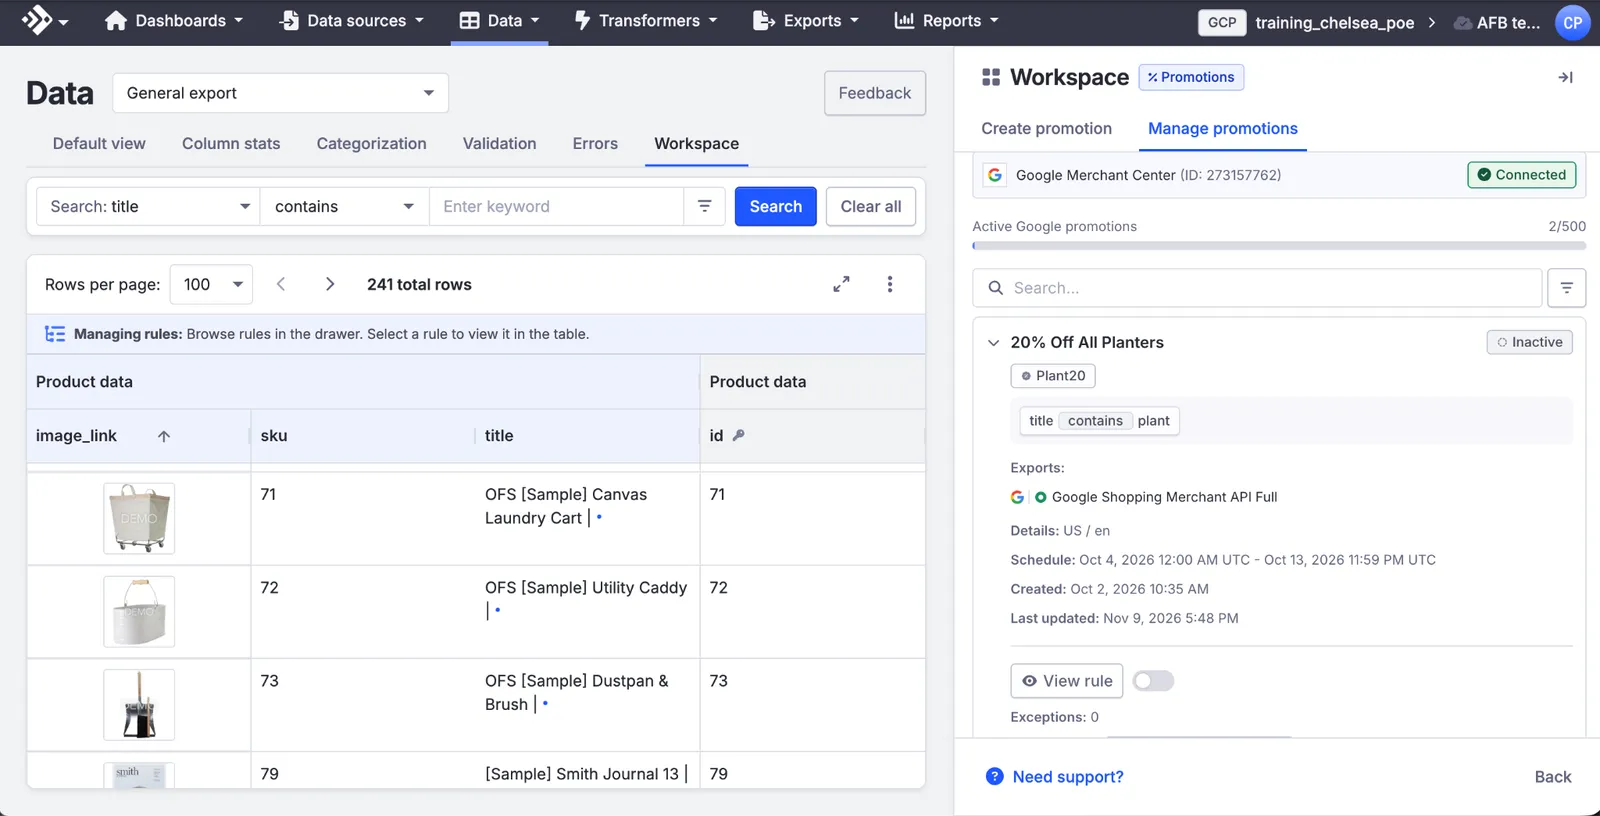
- Active Google promotions: shows how many promotions are currently active against your account’s quota. Google caps the number of active promotions per account.
- Search: find a specific promotion by title or Promotion ID.
- Per-promotion details: exports, country/language, schedule (start and end dates), and created and last-updated timestamps.
- View rule / toggle: view the product-assignment rule behind a promotion, and enable or disable it.
- Exceptions: the count of products excluded from this promotion’s assignment rule.
- Google status: the promotion’s live status as reported by Google, for example Live, or Not found in Google Merchant Center while a new promotion is still syncing.
Get help
Most of what’s covered in this guide, such as creating a promotion, assigning it to products, and checking its status, can be done yourself directly in the workspace. If you hit something the workspace can’t resolve, a Support Specialist can pick it up from exactly where you left off.
This guide is a general reference. Specific steps or available options may vary slightly depending on your account setup.